
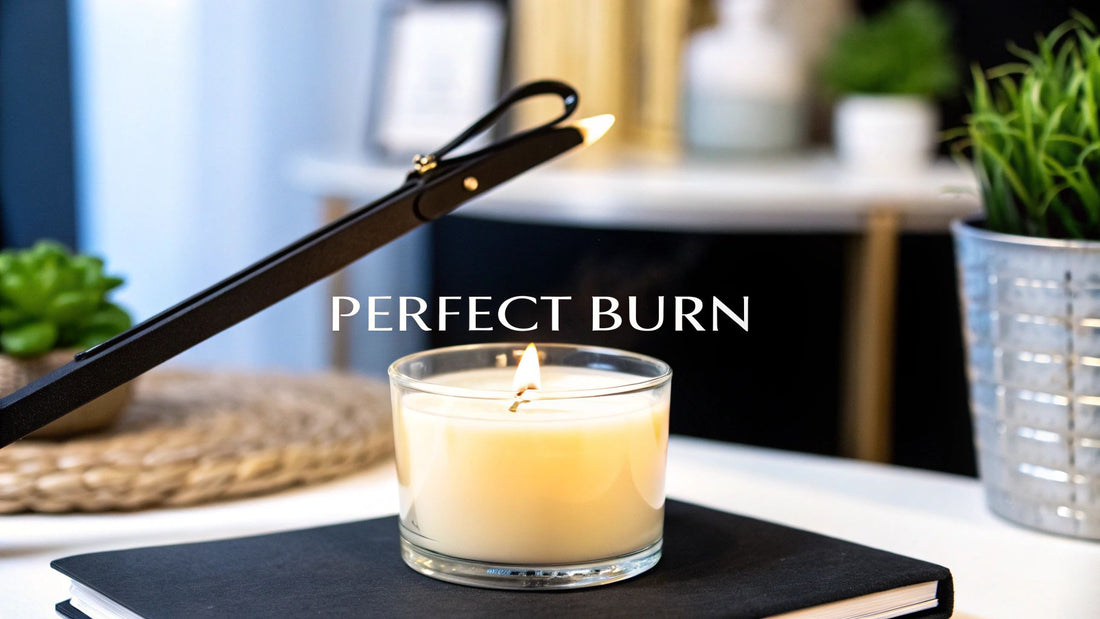
Mastering the Candle Wick Trimmer for a Perfect Burn
Let's be real for a moment—most of us are guilty of lighting a candle and completely forgetting about the wick. It seems like such a small detail, but ignoring it can shorten your candle's life, fill your air with soot, and dull its beautiful fragrance. A candle wick trimmer isn't just another fancy gadget; it's the one tool that makes sure you're getting the absolute best experience from every candle you light.
Think of it as the secret to a cleaner, longer-lasting, and more aromatic burn.
Why Your Favourite Candle Deserves a Wick Trimmer
Ever had a candle burn straight down the middle, leaving tons of wax on the sides? Or noticed ugly black smoke staining the jar and maybe even your wall? The culprit, almost every single time, is an untrimmed wick.
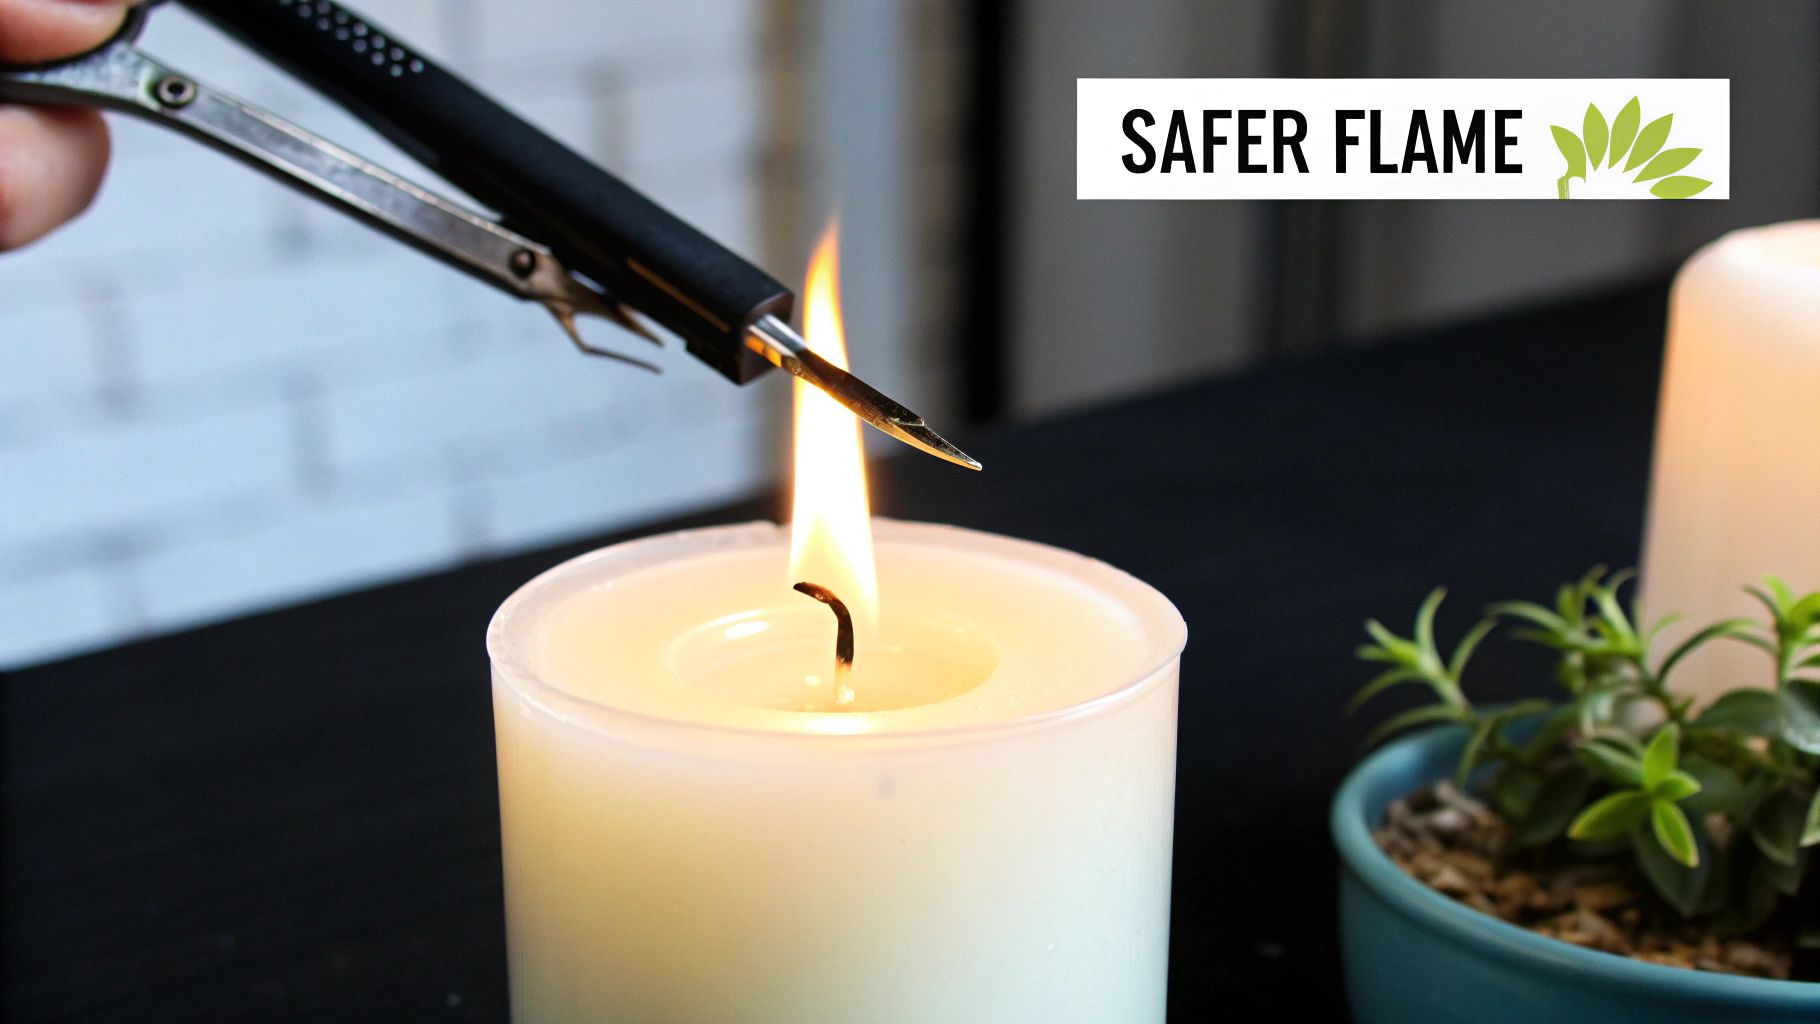
Now, you might be tempted to just grab a pair of scissors, but I can tell you from experience that’s a bad idea. Regular scissors tend to mash and fray the wick instead of giving it a clean snip. They’re also clumsy to use once the wax level drops, making it nearly impossible to reach the wick without getting soot and burnt bits all over the clean wax surface. This is exactly where a purpose-built wick trimmer proves its worth.
The Advantage of Smart Design
A proper wick trimmer is engineered for one job and one job only. Its unique angled design lets you reach the wick easily, no matter how far down the candle has burned. But the real game-changer is the small, built-in tray that catches the clipped end of the wick.
That little debris-catching plate is what makes all the difference. It cleanly removes the carbon buildup and soot, preventing it from falling into the wax pool and creating a messy, inefficient burn.
This simple bit of upkeep is how you achieve that coveted "clean burn." By keeping your wick trimmed to a consistent 1/4 inch, you create a smaller, more controlled flame. This allows the wax to melt evenly from edge to edge, which stops tunnelling in its tracks and helps the candle throw its scent more effectively. If you're looking for more ways to boost your candle's aroma, our expert guide on how to make candles smell stronger has some great tips.
This isn't just a niche trick; candle lovers across Canada are catching on. The demand for artisanal and sustainable candles has sparked an 8% annual growth in the market. Naturally, tools that help preserve these candles and ensure a clean burn have become must-haves. You can see this trend reflected in offerings from suppliers like Norden Candle Supply.
How to Choose the Right Candle Wick Trimmer
Picking the right candle wick trimmer might seem like a minor detail, but I've learned from experience that it makes a world of difference to your candle's performance and your daily ritual. It’s not just about a clean cut; it's about finding a tool that feels right in your hand and fits your personal style.
At its core, a wick trimmer is a simple tool. Most are made from stainless steel because it's tough, rust-resistant, and gets the job done without any fuss. But let's be honest, aesthetics matter. Many of us now choose trimmers with finishes like matte black, brushed gold, or even rose gold to match our home decor. They function just like their plain steel counterparts but add a touch of elegance, turning a simple task into a satisfying moment.
Material and Design Matter
Beyond just looking good, pay close attention to the trimmer's construction. A quality tool should have some heft to it and feel sturdy, not flimsy. The cutting action needs to be smooth and precise to give you that perfect ¼ inch wick every time. Don’t forget about the handles—you want a comfortable grip that lets you apply steady pressure without awkwardness, especially if you're tending to multiple candles.
The length of the trimmer is another crucial detail. Have you ever tried to trim the wick of a nearly finished jar candle with a short tool? It's frustrating. If you're a fan of those deep jar styles, a long-handled or angled trimmer is an absolute must-have to reach the wick as it burns down.
The goal is to find a trimmer that not only looks great on your shelf but also feels like a natural extension of your hand. It should make wick trimming an effortless, clean, and satisfying task every single time.
This isn't just anecdotal, either. The growing appreciation for proper candle care is backed by some interesting numbers. By 2022, Canadian e-commerce data showed wick trimmer sales accounted for roughly 12-15% of all candle accessory purchases—a figure that had doubled in just five years. In provinces like Ontario and British Columbia, people were spending between CAD 15 and CAD 40 on a single trimmer, signalling a clear shift towards investing in quality tools. This trend is easy to see when you browse the amazing variety of vintage and modern styles available on platforms like Etsy's Canadian marketplace. It’s clear that for many, a good wick trimmer is no longer an afterthought but a worthwhile investment.
Wick Trimmer Feature Comparison
Choosing between the different types can feel a bit overwhelming, so I've put together a simple table to compare the most common options. This should help you figure out which one is the best fit for your needs and your candles.
| Feature | Standard Stainless Steel | Decorative Finish (e.g., Matte Black) | Long-Handled/Angled |
|---|---|---|---|
| Material | Durable, rust-resistant stainless steel. | Stainless steel with a decorative coating (gold, black). | Usually stainless steel, can also have finishes. |
| Style | Utilitarian and classic. Purely functional. | Stylish and modern. Complements home decor. | Functional and ergonomic. Designed for reach. |
| Ideal Use Case | Everyday use for standard pillar or small jar candles. | Displayed alongside candles on a tray or shelf. | Deep jar candles or reaching wicks in lanterns. |
| Maintenance | Very low-maintenance, easy to wipe clean. | Requires gentle cleaning to avoid scratching the finish. | Needs occasional wiping to clear soot from joints. |
| Price Point (Typical CAD) | $15 - $25 | $20 - $40 | $25 - $45 |
Ultimately, the best trimmer for you is the one you'll actually use. Whether you prioritize pure function with a classic stainless steel model or want a decorative piece that doubles as a tool, the right choice will make your candle care routine a breeze.
The Art of the Perfect Trim
Alright, let's get into the satisfying part—how to actually use your wick trimmer. This isn't just a chore; it's a little ritual that sets your candle up for a perfect, clean burn every time.
First things first, and this is the golden rule: always trim the wick before you light it, when the wax is completely cool and solid. Trust me, trying to trim a warm, soft candle is a surefire way to make a mess.
How To Get The Perfect 1/4-Inch Cut
Grab your candle wick trimmer and hover it over the wick. The real genius is in the tool's design. See that flat, circular base plate? Go ahead and rest it right on the surface of the wax. This little feature is what makes it foolproof—it automatically measures the cut for you, so you get that ideal 1/4-inch height without any guesswork.
Now, gently squeeze the handles. You should hear a clean, crisp snip as the blades slice through the wick.
Take a look at the trimmer. That burnt, mushroomed bit of the old wick is now sitting neatly in the built-in tray. This is a game-changer because it stops any charred debris from falling into your pristine wax, which can cause dark spots and even mess with the scent. Simply lift the trimmer out and toss the clipping.
This image really shows the technique in action—notice how the base sits flat on the wax.
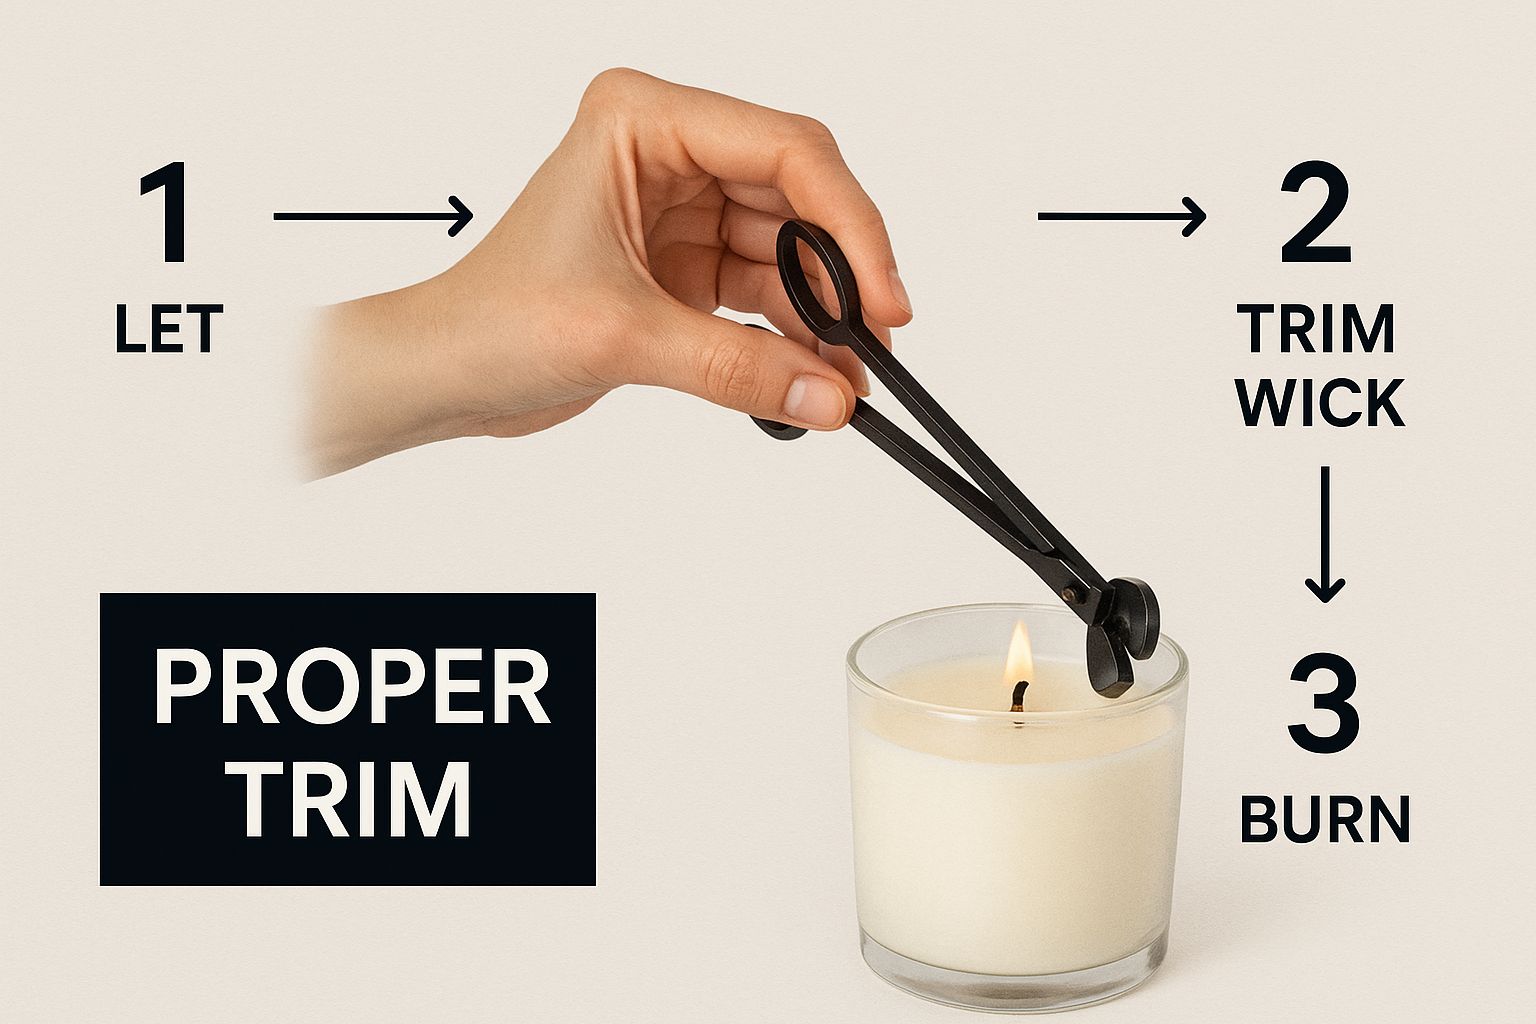
As you can see, resting the trimmer's base flush against the wax surface is the secret to getting a consistently perfect wick height, every single time.
Why It Matters
Your goal is to take that wick from what it looks like after a burn—usually long, blackened, and with a "mushroom" top—and turn it into a short, neat stump. This simple step is the most important thing you can do to control your candle's flame.
A short, clean wick creates a small, steady flame. This controlled burn prevents soot, stops tunnelling, and ensures the candle melts evenly, releasing its fragrance beautifully and extending its life significantly.
Instead of a wild, dancing flame that spits out smoke, you get a calm, consistent glow. This is what separates a candle that just burns from one that performs flawlessly, creating the exact ambiance you're looking for. It’s a tiny action that makes a huge difference in your whole candle experience.
Unlock a Better Burn and a Cleaner Home
It seems like such a small thing, but trimming your candle's wick is the secret to getting that beautiful, flawless burn you see in magazines. When you keep the wick short and tidy, you get a smaller, more controlled flame. This one simple act is your best weapon against the dreaded "tunnelling" effect—that frustrating moment when your candle burns a hole straight down the middle, leaving a thick wall of perfectly good wax behind.
A proper trim means the wax melts evenly across the entire surface, right to the edges of the jar. This is how you unlock your candle's full potential, seriously extending its burn time and letting you enjoy your favourite scent for that much longer. But it's not just about getting more for your money.
Better Air and A Safer Space
Let's talk about what happens when you don't trim. An overgrown wick, especially one that has "mushroomed" at the top, creates a large, flickering flame. Not only does this burn through your wax faster, but it's also a safety issue. A bigger flame is a hotter, more unpredictable flame. You can learn more about this in our guide covering top candle safety tips for a safe and cozy home.
Worse yet, that big flame is the primary culprit behind ugly black soot. It stains the inside of your beautiful candle jar and, more importantly, releases fine particles into the air you breathe. Making a quick snip with a candle wick trimmer before each burn is a simple habit that makes for a cleaner, healthier home.
A correctly trimmed wick is the cornerstone of candle care. It ensures a longer lifespan, a cleaner burn, and a safer flame, turning a simple candle into a lasting, high-performance luxury.
This isn't just a personal observation; it's backed by the experience of countless candle lovers. In fact, a 2023 survey by select Canadian candle studios found that 76% of people who regularly used a wick trimmer noticed their candles lasted significantly longer—sometimes by as much as 25-30%. What's more, 68% reported less black soot on their jars and nearby surfaces, proving the direct link to better indoor air quality.
Ultimately, a wick trimmer isn't just another pretty accessory. It's one of the most practical and effective tools you can own, guaranteeing every candle you light performs exactly as it should.
Common Trimming Mistakes and How to Fix Them
Even with the best candle wick trimmer in hand, we all make little mistakes. It’s completely normal, and honestly, it's how you learn to get the most out of your candles. Think of it as part of the candle care journey. Most of these slip-ups are incredibly simple to fix.
One of the most common oversights? Forgetting to trim the wick before you light the candle. We've all been there. If you notice it right after lighting, just gently blow out the flame. Let the wick and wax cool down completely, then give it a proper trim and relight. Easy.
Fixing a Too-Short Trim
On the other hand, sometimes you can get a little overzealous and snip the wick too short. If you find your tiny flame struggling to stay lit or looking like it’s about to get swamped by the wax pool, there's a simple fix.
Carefully take a corner of a paper towel and dip it into the melted wax to soak up the excess. This gives the short wick more space and oxygen, allowing it to burn properly again.
If this feels like a regular occurrence, you might be looking at a different issue called tunnelling. For a complete walkthrough, our guide on why your candle is burning unevenly and how to fix it has some fantastic, in-depth advice.
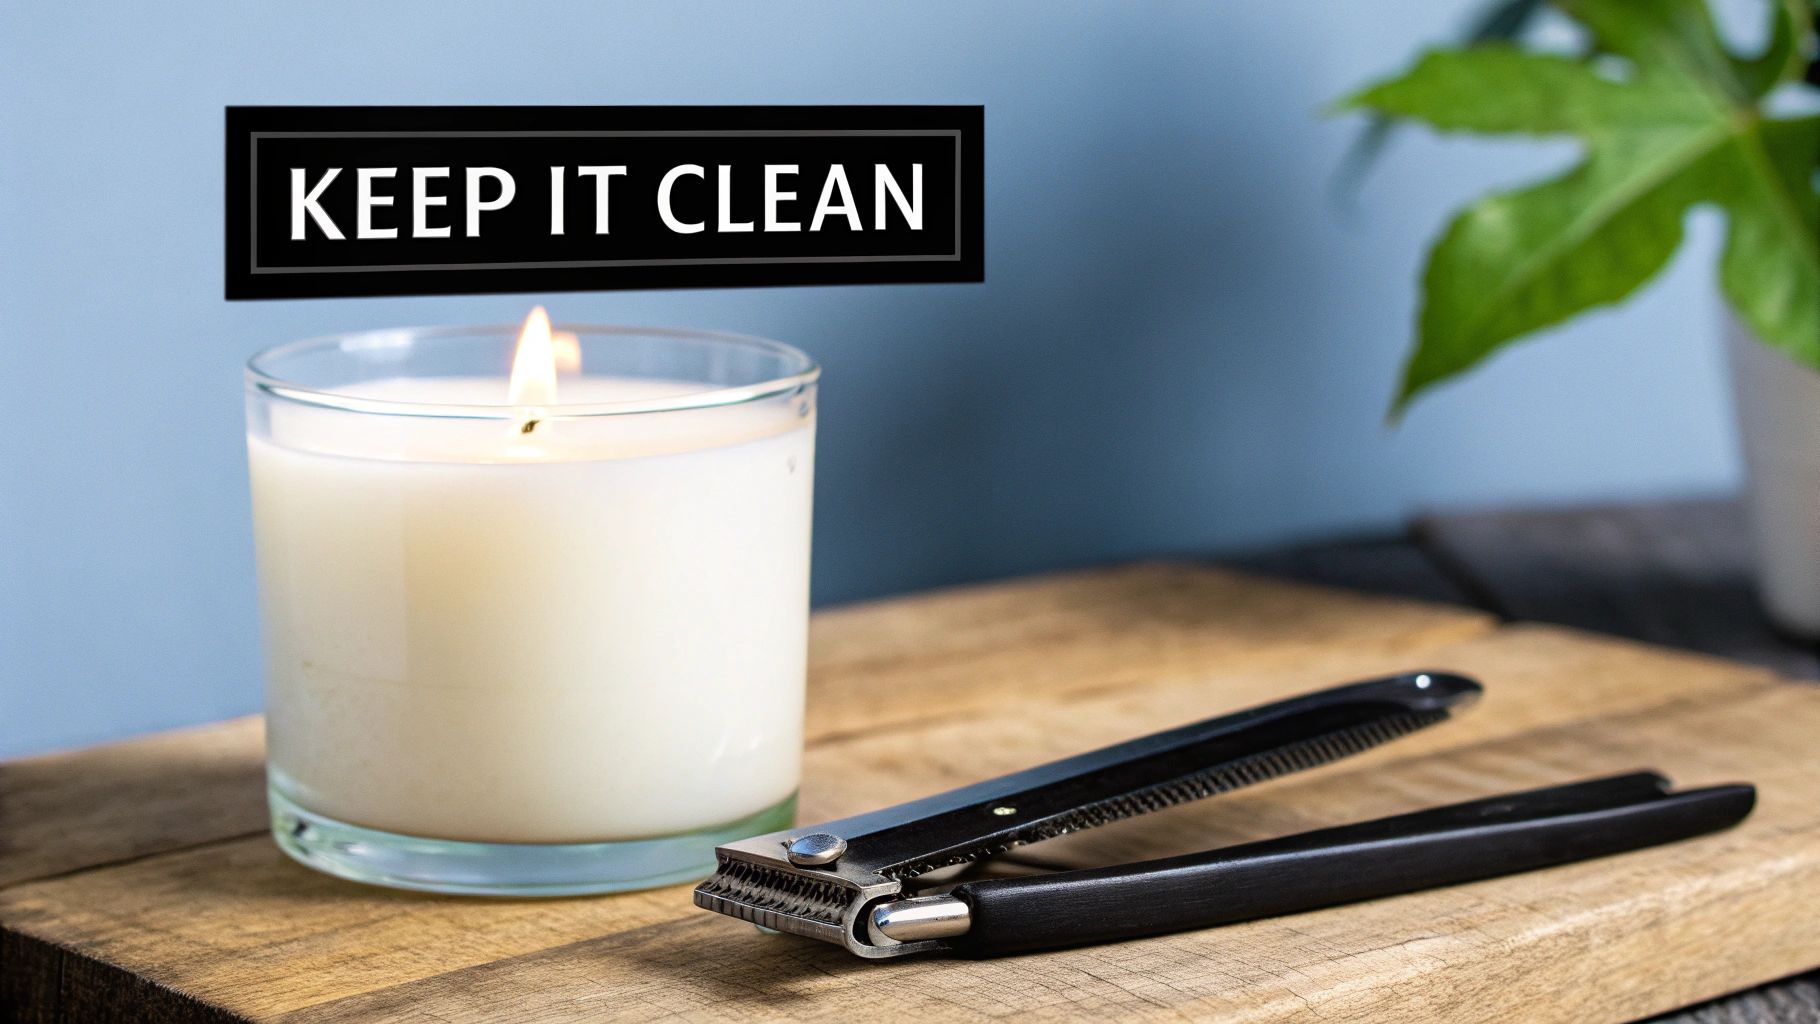
Pro Tip: Don't clean your trimmer with water, as it just smears the waxy, sooty residue. Instead, a quick wipe with a cloth dampened with a bit of rubbing alcohol does the trick beautifully. It dissolves the buildup instantly, leaving your tool clean for its next use.
It’s also worth mentioning that specialty wicks require a different approach. For wooden wicks, I've found it's best to skip the trimmer altogether. Once the candle is completely cool, you can gently pinch off the charred, ashy tip with your fingers. It should break off cleanly, preventing any splintering and setting you up for a perfect burn.
Answering Your Wick Trimmer Questions
Even with the best instructions, you probably still have a few questions about getting the most out of your candle wick trimmer. I get it. Let’s clear up some of the most common things people ask, so you can feel completely confident in your candle care routine.
Can't I Just Use a Pair of Scissors?
I hear this one all the time. While it seems like a simple solution, grabbing a pair of household scissors is one of the biggest mistakes you can make. They just aren't designed for the job.
Regular scissors tend to squeeze and crush the wick, leaving it frayed and split. This makes it harder to light and can cause it to burn unevenly. Plus, once your candle has burned down a bit, trying to angle straight scissors into the jar without getting soot on the glass or wax is next to impossible.
A proper wick trimmer is built specifically for this purpose:
- The angled design lets you reach deep into any candle jar with ease.
- A small base plate ensures you get a perfect 1/4-inch cut every single time by resting right on the wax surface.
- Best of all, it has a little tray that catches the clipped, burnt end so it doesn't fall into your clean wax.
It's a small tool that makes a massive difference in precision and cleanliness.
How Often Do I Need to Trim the Wick?
This is the golden rule of candle care: trim the wick before every single burn. No exceptions.
After you burn a candle, a little ball of carbon, often called a "mushroom," forms on the tip. If you relight the candle without removing it, you'll get a tall, flickering flame that spits out soot and smoke.
Making a quick trim part of your pre-lighting ritual guarantees a clean, steady flame every time. This simple habit is the secret to getting the most life out of your candle and enjoying its pure fragrance without any smoky interference.
Think of it like a chef sharpening their knives before starting a meal. A quick wick trim is the essential prep work for a perfect candle experience.
Will a Trimmer Work on My Wooden Wicks?
Yes, you can absolutely use a wick trimmer on wooden wicks, though the approach is a little different. Wooden wicks are naturally more brittle than cotton ones, and a forceful snip can sometimes cause them to splinter or break off too low.
Honestly, many people (myself included) find it easier to just use their fingertips. Once the candle is completely cool, gently pinch off the charred, ashy bits at the top of the wick. The goal is the same: remove the burnt debris for a clean, crackling burn next time.
What’s the Best Way to Clean My Wick Trimmer?
After a few uses, you’ll start to see some black soot and waxy residue build up on your trimmer. Keeping it clean is important so it stays sharp and doesn't transfer old gunk into a new candle.
Usually, a firm wipe with a dry paper towel is all it takes. For stubborn, waxy buildup, lightly dampen a cloth with some rubbing alcohol—it cuts through the residue instantly. A clean trimmer is a happy trimmer!
Ready to put your new skills to the test? Explore the beautifully handcrafted, clean-burning candles at Shivora Candles to find your next signature scent. Discover the collection at ShivoraCandles.com.