


It's a classic scene: a lovely candlelit dinner, a relaxing bath, and then—drip! A glob of hot wax lands right on your favourite sweater. Your immediate instinct might be to grab a napkin and wipe it away, but that's the worst thing you can do.
Trust me on this one. The absolute key to getting candle wax out of fabric is to first let it cool down and harden completely. Once it's solid, you can gently scrape off the excess, use a warm iron to lift the rest into a paper towel, and then tackle any lingering oily residue. This simple freeze-scrape-heat method is my go-to, and it works like a charm on most materials.
What to Do Right After a Wax Spill
That moment of panic when you see molten wax on your clothes is real, but fighting the urge to smear it is your first and most important move. Wiping hot wax only grinds it deeper into the fibres, creating a much bigger, more stubborn problem to solve later.
Instead, just let it be. Let the wax cool down and solidify on its own. If you're in a hurry, you can speed things up by placing a few ice cubes over the spot or even putting the whole garment in the freezer for about 20-30 minutes. The goal is to get the wax so cold and brittle that it practically pops off the fabric.
To make this crystal clear, here’s a quick-reference table for those first crucial moments.
Immediate Actions for Candle Wax Spills
| What You Should Do | What You Should Avoid | The Reason It Works |
|---|---|---|
| Let it cool completely. | Wiping or smearing the hot wax. | Hardened wax lifts away from fibres; hot wax gets ground in deeper. |
| Apply ice or freeze the item. | Applying direct heat at this stage. | Cold makes the wax brittle and easy to flake off the surface. |
| Be patient. | Rushing the process. | A few minutes of waiting will save you a lot of scrubbing later. |
Think of it as first aid for your fabric—doing the right thing immediately makes the rest of the treatment far more effective.
Why This Method Works So Well
The science behind this trick is pretty straightforward. Most candles are made from paraffin or a similar wax that melts at a relatively low temperature, usually somewhere between 46°C and 68°C. When you rapidly cool it, the wax contracts and solidifies, pulling away from the fabric's weave as it hardens. You can dive deeper into the properties of different waxes with insights from candle-making experts, but the principle remains the same. The cold makes the wax want to separate from the cloth, allowing you to easily chip most of it away with a dull knife or the edge of a credit card.
Expert Tip: The single most important thing you can do is resist the urge to wipe. Let the wax harden fully. This one simple act of patience prevents a small drip from becoming a permanent stain.
Getting this initial cooling step right sets you up for success and makes the rest of the process surprisingly easy. It’s your best defence against a minor accident turning into a ruined garment.
Scraping Away the Hardened Wax
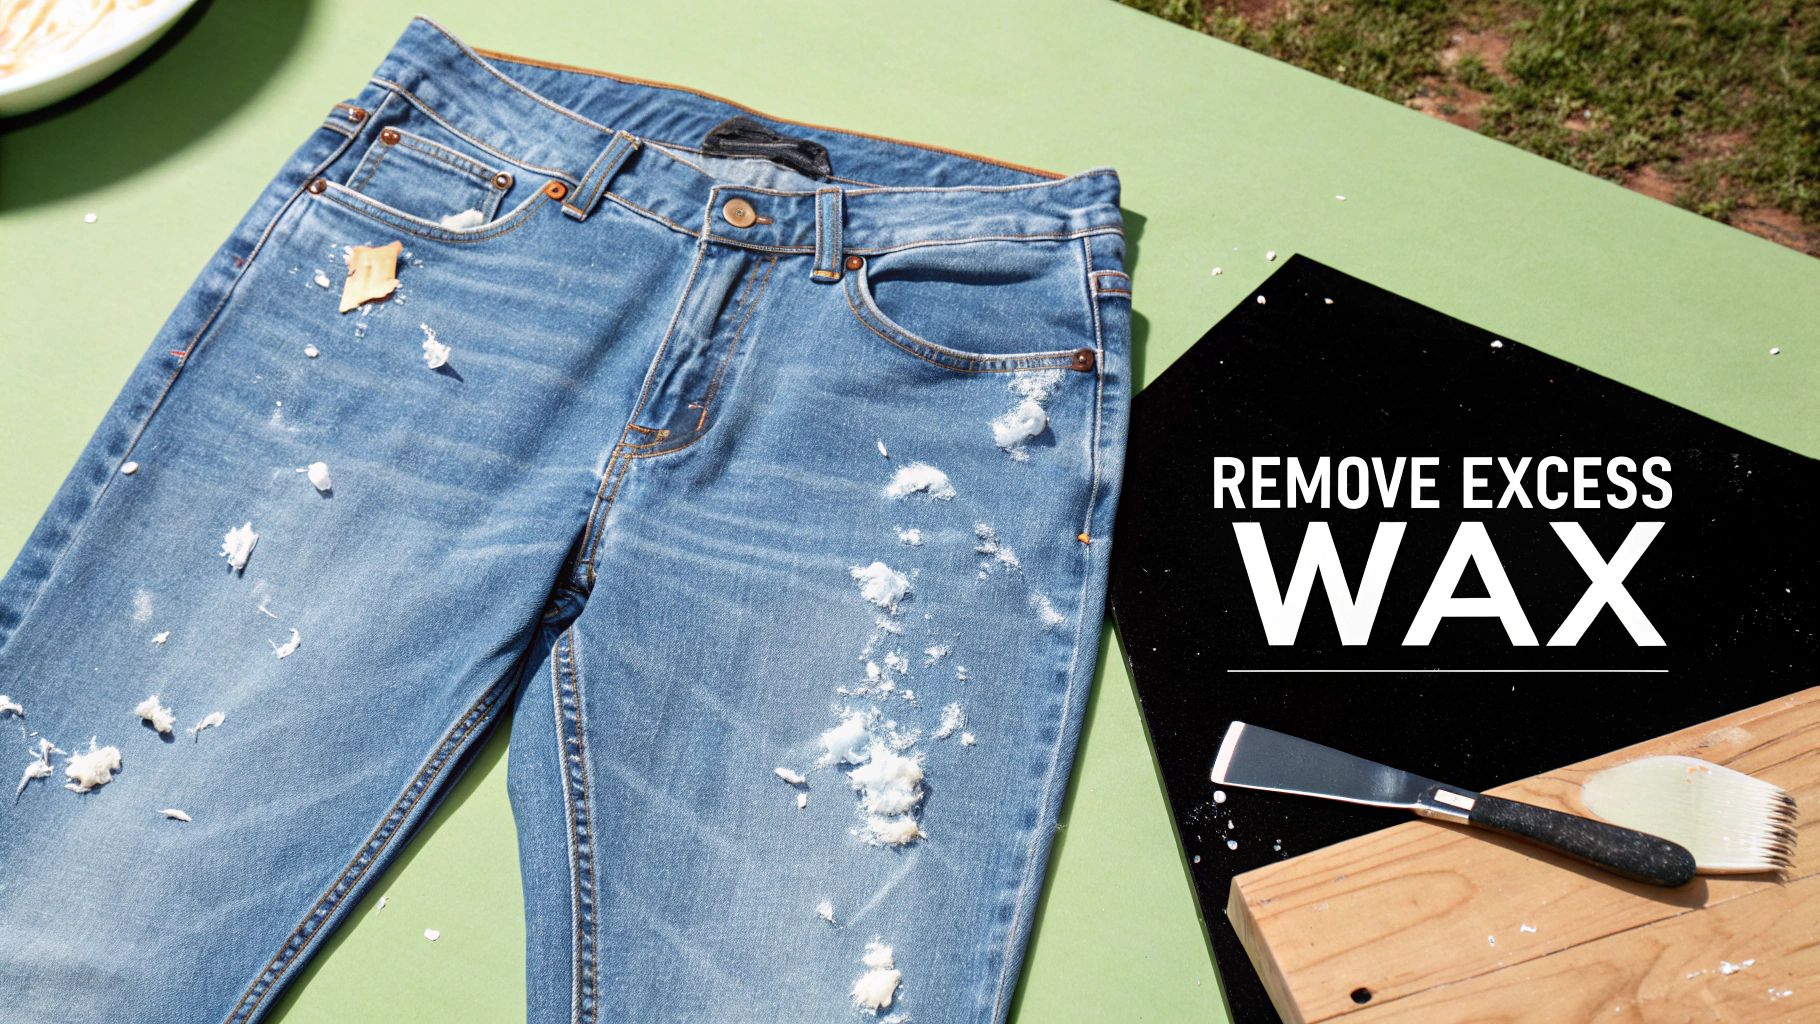
Now that the wax is frozen solid, it’s time to get off as much of that hardened chunk as you can. This stage is all about finesse, not force. The idea is to gently lift the wax away from the clothing fibres without damaging them.
Your main goal here is to flake off the solid, surface-level wax. Doing this first makes the next part—tackling the greasy stain left behind—so much easier. Think of it as clearing the debris before you can do the deep clean.
Finding the Right Tool
You don't need anything fancy for this; in fact, the best tools are probably sitting in your kitchen drawer or wallet right now. Just be sure to avoid anything with a sharp edge, as one slip could tear or snag your favourite shirt.
Here are a few of my go-to items:
- A dull butter knife: The rounded tip and blunt edge are perfect for gently prying under the wax without catching on the fabric.
- The edge of a credit card: Surprisingly effective. Its firm, straight edge is great for sliding under the wax and popping it off.
- A spoon: Use the side of the spoon’s bowl to carefully chip away at the solid wax.
To get started, lay the garment on a flat, sturdy surface like a countertop or table. Hold the fabric taut with one hand, and with the other, use your chosen tool to gently scrape and pry at the wax. Work from the outside edges of the spill inward. You’ll be surprised at how much simply flakes right off.
Pro Tip: Always scrape in a direction away from your body for safety. It's also crucial to match your pressure to the fabric. Be extra gentle with delicates like silk, but you can apply a bit more elbow grease on tough materials like denim or heavy cotton. And whatever you do, never use a sharp knife.
Getting this physical removal done right is a critical first step. It really sets you up for success in getting that candle wax out for good.
Using Heat to Lift the Remaining Wax
Now that you've dealt with the solid, chunky bits of wax, it's time to tackle the greasy stain left behind. That residue has worked its way into the fabric’s fibres, and this is where a little bit of controlled heat comes in handy. The idea is to carefully re-melt the last of the wax so you can pull it right out of the garment.
The best tool for the job is a regular household iron. It's a surprisingly effective way to get candle wax out of clothes without causing any damage. Just lay the item flat on an ironing board and place something absorbent, like a plain brown paper bag or a few paper towels, over the waxy spot. If you can, it’s a great idea to sandwich the stain by putting another piece of paper inside the clothing, right under the wax.
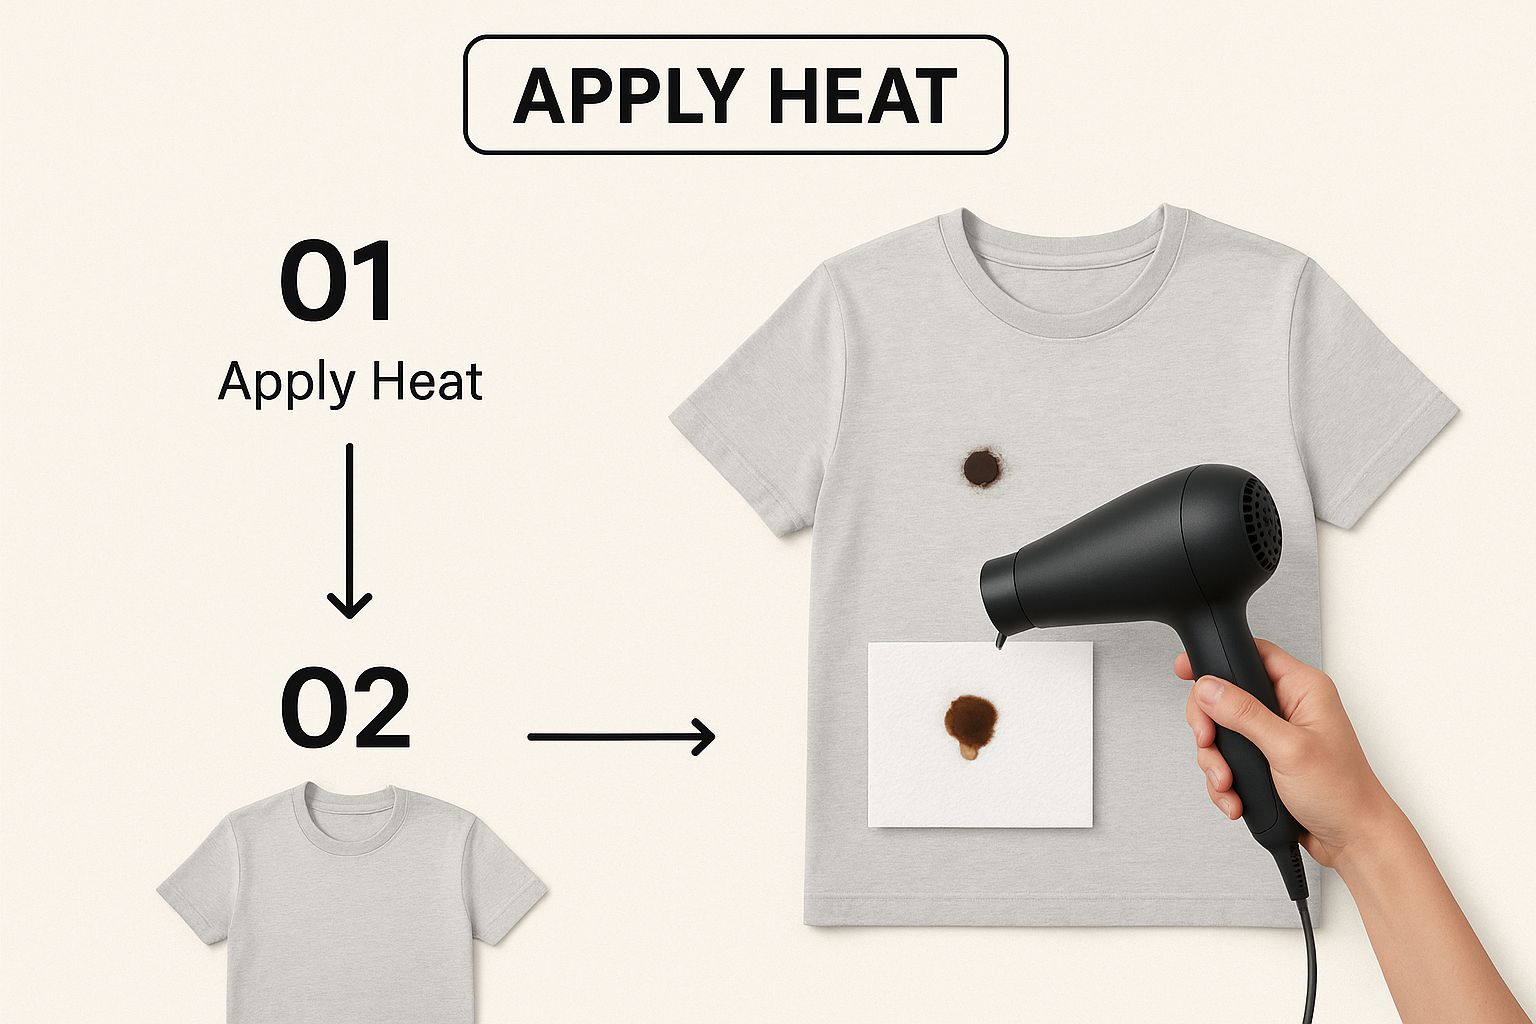
As you can see, the gentle heat liquefies the wax, and the paper acts like a sponge, wicking the oily stuff out of the fabric. It’s a classic trick that’s been passed down for a reason—it really works.
Ironing the Stain Away
First things first, set your iron to a low, no-steam setting. You want warmth, not scorching heat. Too much heat can damage delicate fabrics or, even worse, set the oily part of the stain for good.
Gently press the warm iron over the paper for just a few seconds at a time. You'll see the paper start to darken as it soaks up the melted wax. It’s actually quite satisfying to watch!
Lift the iron frequently to check your progress. You should see an oily spot on the paper. The secret here is to constantly move the paper to a clean, dry section before you press again. If you don't, you'll risk transferring the wax right back onto the fabric.
This method is incredibly reliable. A consumer protection agency survey from 2022 found that 43% of people turn to the iron-and-paper technique. More importantly, they reported a 78% success rate in completely getting rid of the stain.
Keep pressing and shifting the paper until it no longer pulls up any more wax. This might take a few minutes, so be patient. A little extra time here makes all the difference. Once the paper comes away clean, the wax itself should be gone, and you'll be ready for the final step: treating any faint oil mark left behind.
Dealing with That Lingering Oily Mark
Okay, so you’ve managed to get the solid chunk of wax off. Great work! But now you're probably staring at a faint, greasy patch that’s mocking you. This oily shadow is the final ghost of the spill, and getting rid of it is the real secret to making it look like the accident never happened.
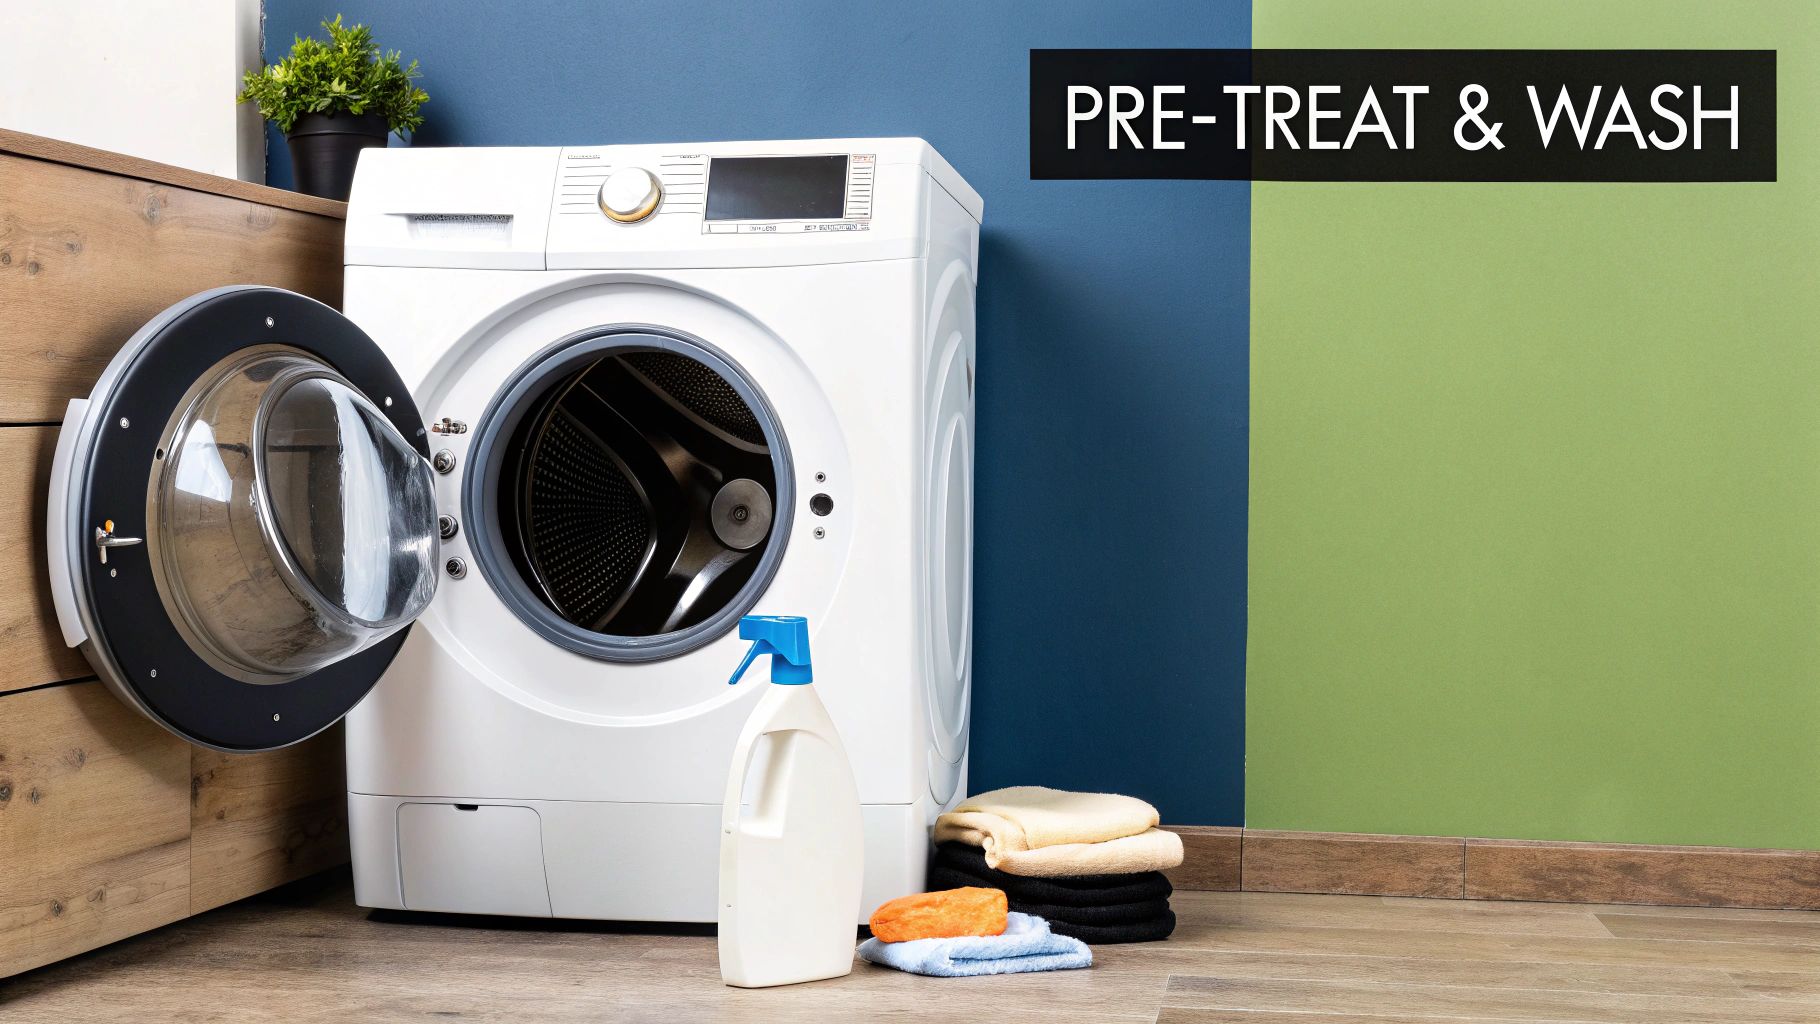
That residue is just the oil and fragrance from the candle that has seeped deep into the fabric's fibres. Your best friend for this part of the job is probably sitting right by your kitchen sink: a good-quality, grease-cutting dish soap. It’s literally designed to break down oils, making it the perfect pre-treatment.
Just put a small drop directly onto the oily spot. Gently work it into the fabric with your fingers or a soft brush, like an old toothbrush. You want to help it penetrate the fibres without being too aggressive.
Picking the Right Treatment for the Job
While I swear by dish soap, it’s not your only option. Depending on what you have in your laundry room and the type of fabric you're dealing with, a couple of other methods work just as well.
Here are a few of my go-to solutions:
- Commercial Stain Removers: A powerful stain spray or gel formulated for oil-based stains is a fantastic choice. Just follow the directions on the bottle, which usually involves letting it sit for about 10-15 minutes before you toss it in the wash.
- Rubbing Alcohol: If you're dealing with a particularly stubborn stain, or if the candle dye left a hint of colour behind, rubbing alcohol can be a lifesaver. Gently dab it on with a cotton ball. Just be sure to test it on a hidden area first, like an inside seam, to make sure it doesn’t lift the fabric's colour.
A quick word of advice from experience: always, always do a spot test. Dab a tiny amount of your chosen cleaner on an inconspicuous area first. This simple check has saved me from accidentally ruining more than a few favourite shirts.
Once you've let the pre-treatment work its magic, it's time for a final wash. Use the hottest water temperature that the garment's care tag says is safe. The heat is crucial for dissolving and rinsing away any last trace of oil.
The type of candle can sometimes make a difference, too. If you're curious, you can explore the benefits of natural soy candles, as they often use oils that can be a bit easier to clean up.
And one last crucial tip: check the garment before you put it in the dryer. The high heat from a dryer will permanently set any oil that’s left, and then you’re really stuck with it.
We’ve all been there: a stray drip of candle wax lands on a favourite silk blouse or cozy wool sweater. Before you panic, just know that you don't have to reach for the iron. In fact, for delicate materials, direct heat is the last thing you want.
So, what’s the secret? A hairdryer. Grab one and set it to its lowest heat setting. Lay a couple of paper towels or a clean, absorbent cloth over the waxy spot. Then, gently warm the area with the hairdryer, making sure to keep it moving so the heat doesn't concentrate in one spot. You'll literally see the wax melt and get absorbed into the paper towel. Just keep swapping out the towel for a fresh one until the wax is all gone.
Key Takeaway: When you're dealing with delicate fabrics, the mantra is "low and slow." A hot iron can easily scorch or even melt sensitive fibres like polyester or nylon, so always use gentle, indirect heat.
Working with Tricky Textures and Non-Washable Materials
Things get a bit more complicated with textured fabrics like velvet or corduroy. You can't just scrape away at these without risking damage to their unique pile. The trick is to still freeze the wax first, but then, instead of a knife, use your fingernail or the rounded edge of a spoon to gently lift the hardened wax, always moving in the direction of the fabric's nap.
And what about items you can't just toss in the wash, like leather or suede? Steer clear of heat and liquids altogether. Carefully flake off as much of the hardened wax as you can. If a greasy stain remains, your best and safest bet is to hand it over to a professional dry cleaner. It’s just not worth the risk of causing permanent damage.
The type of candle wax also plays a role. Different waxes, from traditional paraffin to modern soy, behave differently on various materials. It's a problem that's evolved over time; for instance, the boom in synthetic fabrics like polyester since the 1970s meant homeowners needed entirely new stain-removal tricks. You can even find historical research on how paraffin wax adheres to different fabrics if you're curious about the science.
If you want to dive deeper into how modern candle ingredients differ from the classics, check out our ultimate guide to soy wax.
Your Questions About Wax Removal Answered
Even with the best intentions, wax spills happen. Sometimes you’ll hit a snag—a particularly stubborn stain or a unique fabric that leaves you wondering what to do next. I’ve run into just about every wax-related mishap you can imagine, so I've put together answers to the most common questions I get about getting candle wax out of clothes.
Does This Method Work for Coloured Candle Wax?
It does, but you’ll probably have an extra step on your hands. The freeze-and-scrape method, followed by the iron, is fantastic for lifting the actual wax. The problem is that the dye from a beautiful red or deep blue candle can leave its own stain behind.
After you’ve successfully removed all the waxy bits, you'll need to tackle that colour stain. For whites, a gentle oxygen-based bleach usually does the trick. If you’re working with a coloured piece of clothing, reach for a good quality, colour-safe stain remover.
A Quick Pro Tip: Always, always test any stain remover on a hidden spot first, like an inside seam. This quick check saves you from the heartache of accidentally pulling out the fabric's original colour along with the stain.
Once the dye spot is treated, just pop the item in the wash as you normally would.
What if the Wax Stain Is Old and Set In?
Don't toss that garment just yet! An old, set-in wax stain isn’t a lost cause. The process is pretty much the same, but it will demand a bit more patience and maybe a second pass. Start by scraping off as much of that hardened surface wax as you can break loose.
You might find you need to repeat the iron-and-paper-towel step a few times. Just keep shifting to a clean section of the paper towel so it can keep absorbing the melted wax. For that final oily patch, let your pre-treatment solution—like a good grease-cutting dish soap—sit for longer. Give it a good 30 to 60 minutes to really penetrate and break down those old oils before washing. The type of wax can also make a difference; understanding how to make candles with soy wax gives you some insight into why some waxes are softer and easier to remove.
What if the Ironing Method Is Not Working?
If you’re ironing away and nothing is happening, the first thing to check is your heat setting. It might just be too low to melt the wax. As long as the fabric can handle it, nudge the temperature up a little.
But what if you've ironed it several times and a greasy-looking mark just won't budge? The fabric might just be extra absorbent. At this point, it's time to switch gears and bring in a solvent. Try dabbing the spot with a cotton ball dipped in rubbing alcohol; it's surprisingly effective at cutting through that last bit of oily residue. For a truly precious or delicate piece of clothing, though, sometimes the safest move is to admit defeat and take it to a professional dry cleaner. They have access to specialized solvents that can handle the job without any risk.
At Shivora Candles, we believe in creating beautiful moments without the worry. Our hand-poured soy wax candles are crafted for a clean, long-lasting burn, bringing luxury and comfort into your home. Discover your new favourite scent and transform your space.

