


Making candles with soy wax is a truly rewarding process. It's a craft that boils down to a few key actions: melting the wax, blending in your fragrance, setting the wick, pouring, and then the hardest part—letting it cure! It's that perfect blend of precision and creativity that lets you produce beautiful, clean-burning candles right from your own kitchen.
Your Guide to Crafting Soy Wax Candles
Welcome to the wonderful world of candle making! This guide is here to walk you through everything you need to create your own beautiful, clean-burning soy wax candles at home. We'll start by digging into why soy wax has become the go-to choice for so many of us, from its eco-friendly roots to how well it throws a scent.
You'll get a clear picture of the whole journey, from gathering your tools to that magical moment you light your very first handmade candle. Think of this as your roadmap to success, designed to take the mystery out of making candles with soy wax and give you the confidence to create something truly special.
Why Choose Soy Wax?
So, why are so many people choosing soy wax? It really stands out for a few fantastic reasons. First off, it's derived from soybeans, making it a natural, renewable resource. This is a big departure from traditional paraffin wax, which comes from petroleum. That eco-friendly angle is a huge draw for anyone trying to be more conscious about what they bring into their home.
But it’s not just about being green. Soy wax has some practical perks that make it a dream to work with, whether you're a total beginner or a seasoned pro.
- Cleaner Burn: Soy wax burns much cleaner and produces way less soot than paraffin. That means better air quality in your home and no more grimy residue on your jars or walls.
- Longer Lasting: It has a lower melting point, which translates to a slower, longer burn. Simply put, you get to enjoy your handcrafted candles for hours longer.
- Excellent Scent Throw: This is a big one. Soy wax is brilliant at holding onto fragrance oils and releases the scent evenly as it burns, filling your room with a consistent, beautiful aroma.
If you want to get into the nitty-gritty of what makes it so great, exploring the beauty of natural soy wax offers a deeper look into why it's become the top choice for candle makers.
A Growing Trend in Home Crafting
The buzz around soy candles isn't just talk; it's a major market trend. In places like California, the demand for sustainable and eco-friendly home products has caused the soy candle market to skyrocket. This really reflects a bigger shift in what we value as consumers—we want products that are natural and mindfully made.
The North American soy candle market is part of an industry valued at $1.5 billion. It’s projected to grow at a Compound Annual Growth Rate (CAGR) of roughly 7% between 2025 and 2033. You can see more on this growing demand over at Archive Market Research.
Assembling Your Candle Making Toolkit
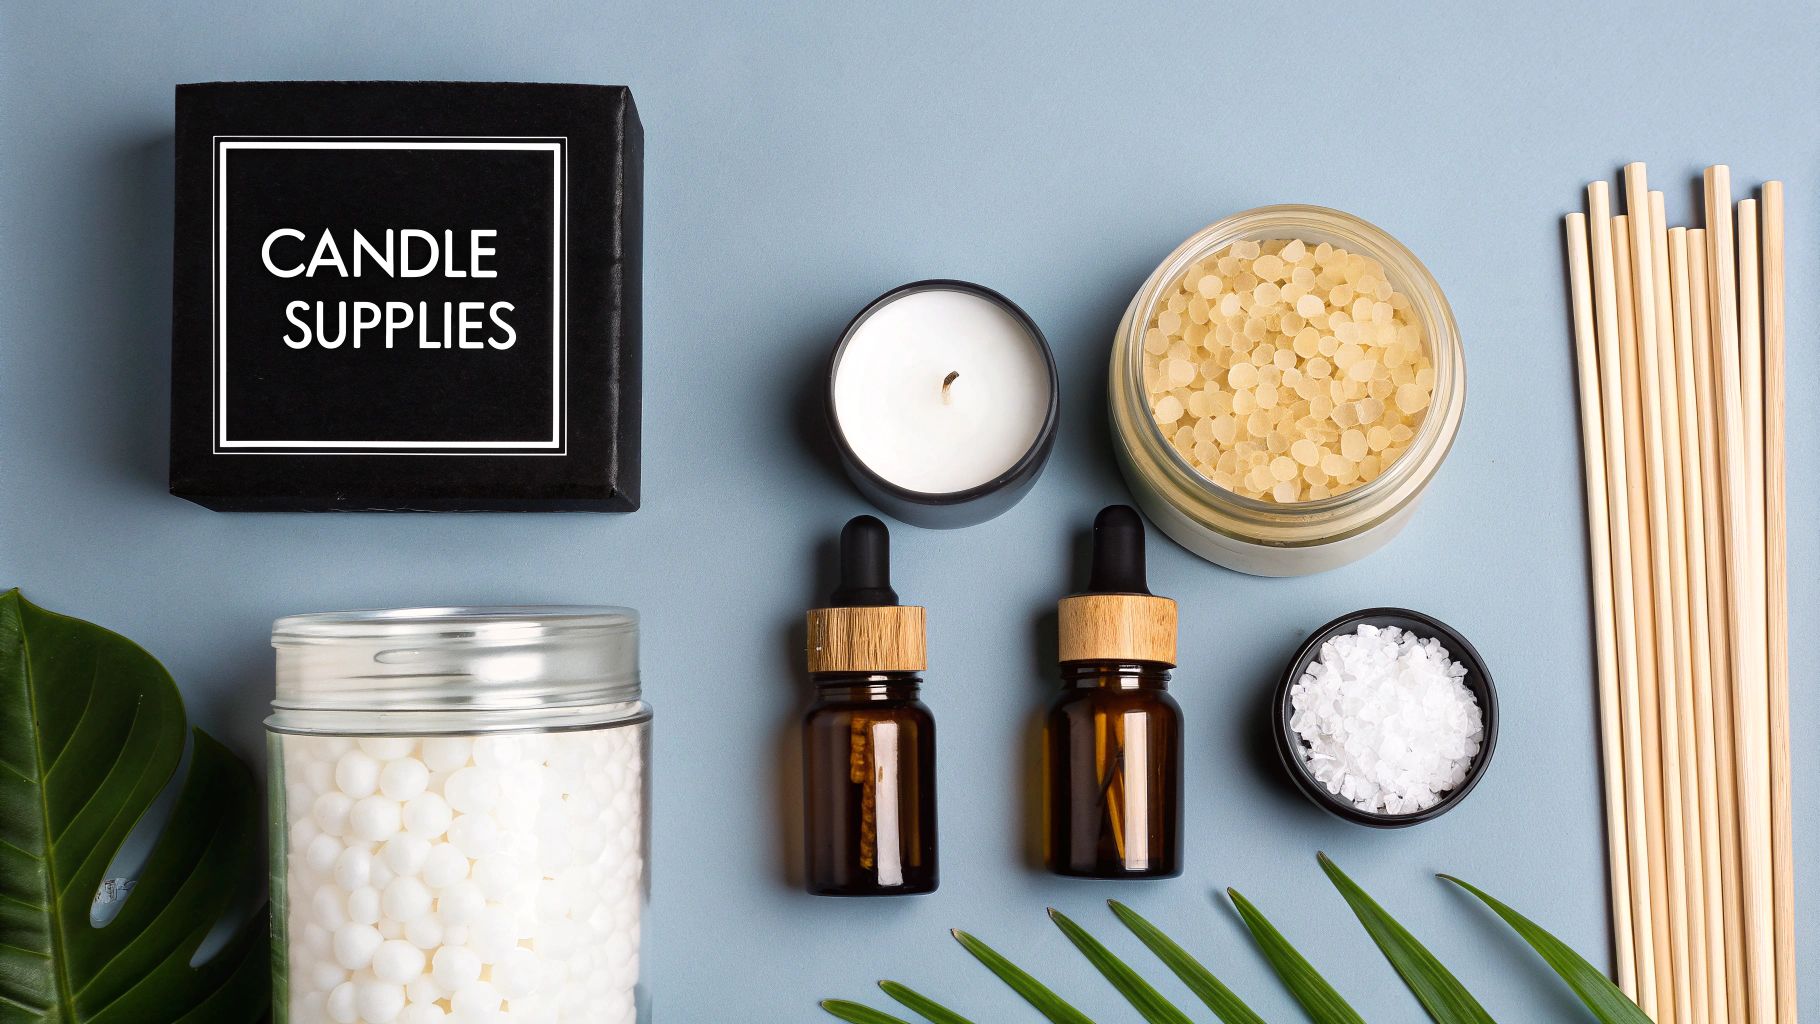
Before we can dive into pouring beautiful candles, we need to gather our supplies. Think of this as your mise en place—getting everything prepped and organised ahead of time makes the actual candle-making process smoother, safer, and a whole lot more fun. When everything is within arm's reach, you can focus on the creative part without scrambling for a tool mid-pour.
This isn't just a shopping list. Let's walk through what you need and, more importantly, why each item is a crucial piece of the puzzle for crafting a top-notch soy candle.
The Core Components
At its heart, a great soy candle boils down to three things: the wax, the wick, and the container. Getting these three elements right from the start is the first and most important step toward achieving that beautiful, clean burn we're all after.
Natural Soy Wax
The star of the show, of course, is the soy wax itself. If you're just starting out, I highly recommend using container blend soy wax flakes. They’re specifically formulated for candles in jars, they melt beautifully, and they’re incredibly easy to measure out. These flakes, made from hydrogenated soybean oil, are a fantastic natural and clean-burning alternative to traditional paraffin wax.
Wicks: Cotton or Wood?
The wick is the engine of your candle, and you’ve got a couple of great choices. The two most common are cotton and wood wicks, and they each create a totally different vibe.
-
Cotton Wicks: These are the classic, tried-and-true choice. They’re reliable, easy to work with, and provide that steady, familiar flame. The key here is to match the wick's thickness to the diameter of your container; this is non-negotiable for getting an even melt pool.
-
Wood Wicks: If you’re aiming for a more rustic, cozy feel, wood wicks are an amazing option. They give off a lovely, gentle crackling sound, almost like a miniature fireplace, which adds a whole other sensory dimension to your candle.
Containers
Your container is where safety and style really come together. Glass jars, ceramic tumblers, and metal tins are all excellent choices. The single most important thing to look for is a container that is heat-safe and seamless. This is critical to prevent the container from cracking or leaking hot wax, which is a serious safety hazard. For your first few batches, a 6-8 ounce jar is a perfect, manageable size.
Essential Tools of the Trade
Beyond the basic materials, a handful of specific tools will make your process precise, safe, and repeatable. These are the items that separate a hobbyist from someone who can produce consistently professional-quality candles.
If there's one piece of advice I can give you, it's this: don't eyeball your measurements. Candle making is as much a science as it is an art. Using a digital scale to measure your wax and fragrance oil by weight is the single best thing you can do to ensure a consistent, amazing scent throw every single time.
To make things simple, here’s a checklist of the supplies you'll want to have on hand before you begin.
Essential Supplies for Soy Wax Candle Making
| Item | Description & Key Considerations |
|---|---|
| Digital Scale | Absolutely essential for accurately measuring wax and fragrance oil. Look for one that measures in small increments (like 0.01 oz or 1 g) for the best precision. |
| Pouring Pot | A dedicated metal pot with a spout makes pouring hot wax much safer and cleaner. Please, never melt wax directly in a kitchen saucepan you use for food. |
| Thermometer | A digital or candy thermometer is critical for monitoring your wax temperature. Hitting the correct temperatures for adding fragrance and pouring is the secret to a flawless candle. |
| Wick Centering Tools | Simple clothespins work in a pinch, but specialized metal wick bars are fantastic. They hold your wick perfectly straight and centred while the wax sets, which is crucial for an even burn. |
Having these tools ready will set you up for success and make your candle-making journey a rewarding one from the very first pour.
Melting and Scenting Your Soy Wax
Alright, this is where the real artistry of candle making comes into play. Transforming a handful of wax flakes into the soul of your candle is all about melting and scenting, and honestly, it’s my favourite part of the process. The key to getting it right? Temperature control. I can't stress this enough—getting the temperature just right is the secret to a beautifully smooth finish and a rich, powerful scent.
If you rush this or let the wax get too hot, you'll be disappointed with the result. Overheating can actually burn off the most delicate notes in your fragrance oil, leaving you with a candle that barely smells at all. What we're aiming for is a slow, controlled melt.
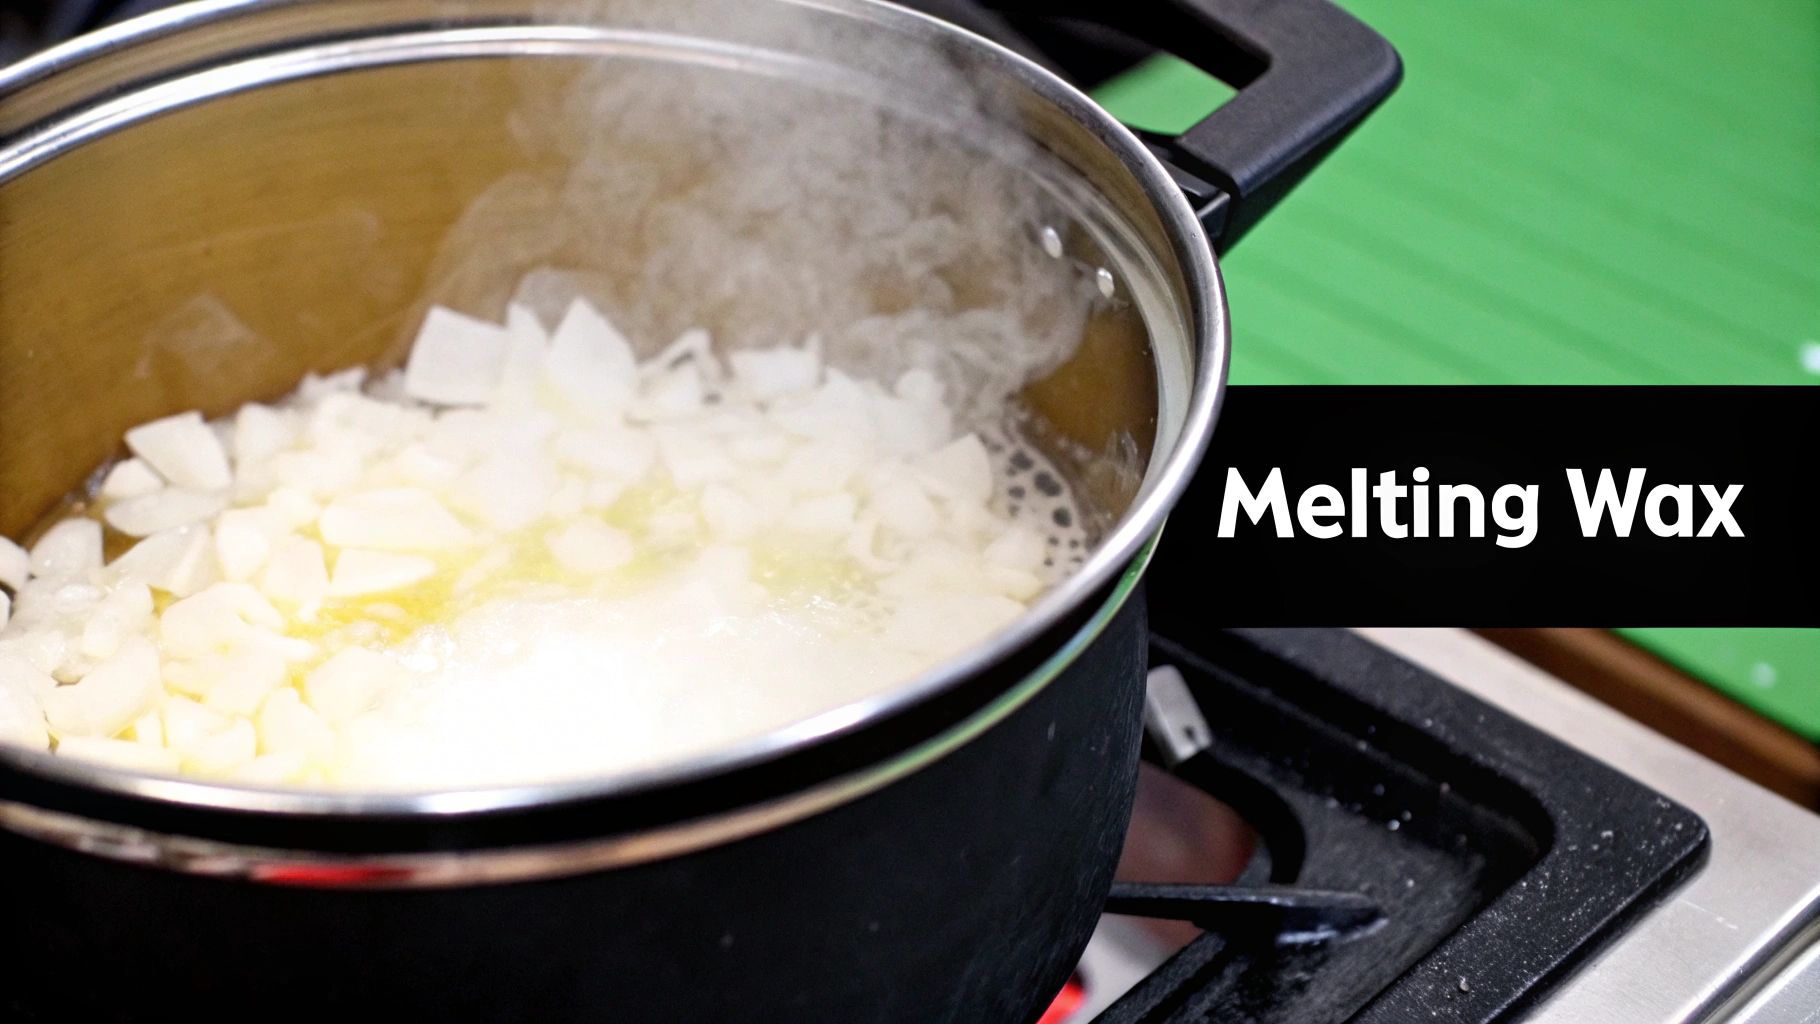
The Double Boiler Method
From my experience, the absolute best and safest way to melt soy wax is with a double boiler. This method uses gentle, indirect heat, which is perfect because it prevents the wax from scorching and gives you precise control. You don't need fancy equipment; a makeshift one works perfectly.
Just grab a regular kitchen pot, fill it with a couple of inches of water, and set your pouring pot (filled with your pre-measured wax flakes) right inside. As the water comes to a simmer, it will gently and evenly melt the wax. Give it a stir every so often to help it along.
Your target temperature is crucial here. For most soy waxes, you’ll want to heat the wax to around 185°F (85°C). This is the sweet spot where the wax and fragrance oil will bond together beautifully. Keep your digital thermometer handy and watch it closely. As soon as you hit that magic number, pull it off the heat before you do anything else.
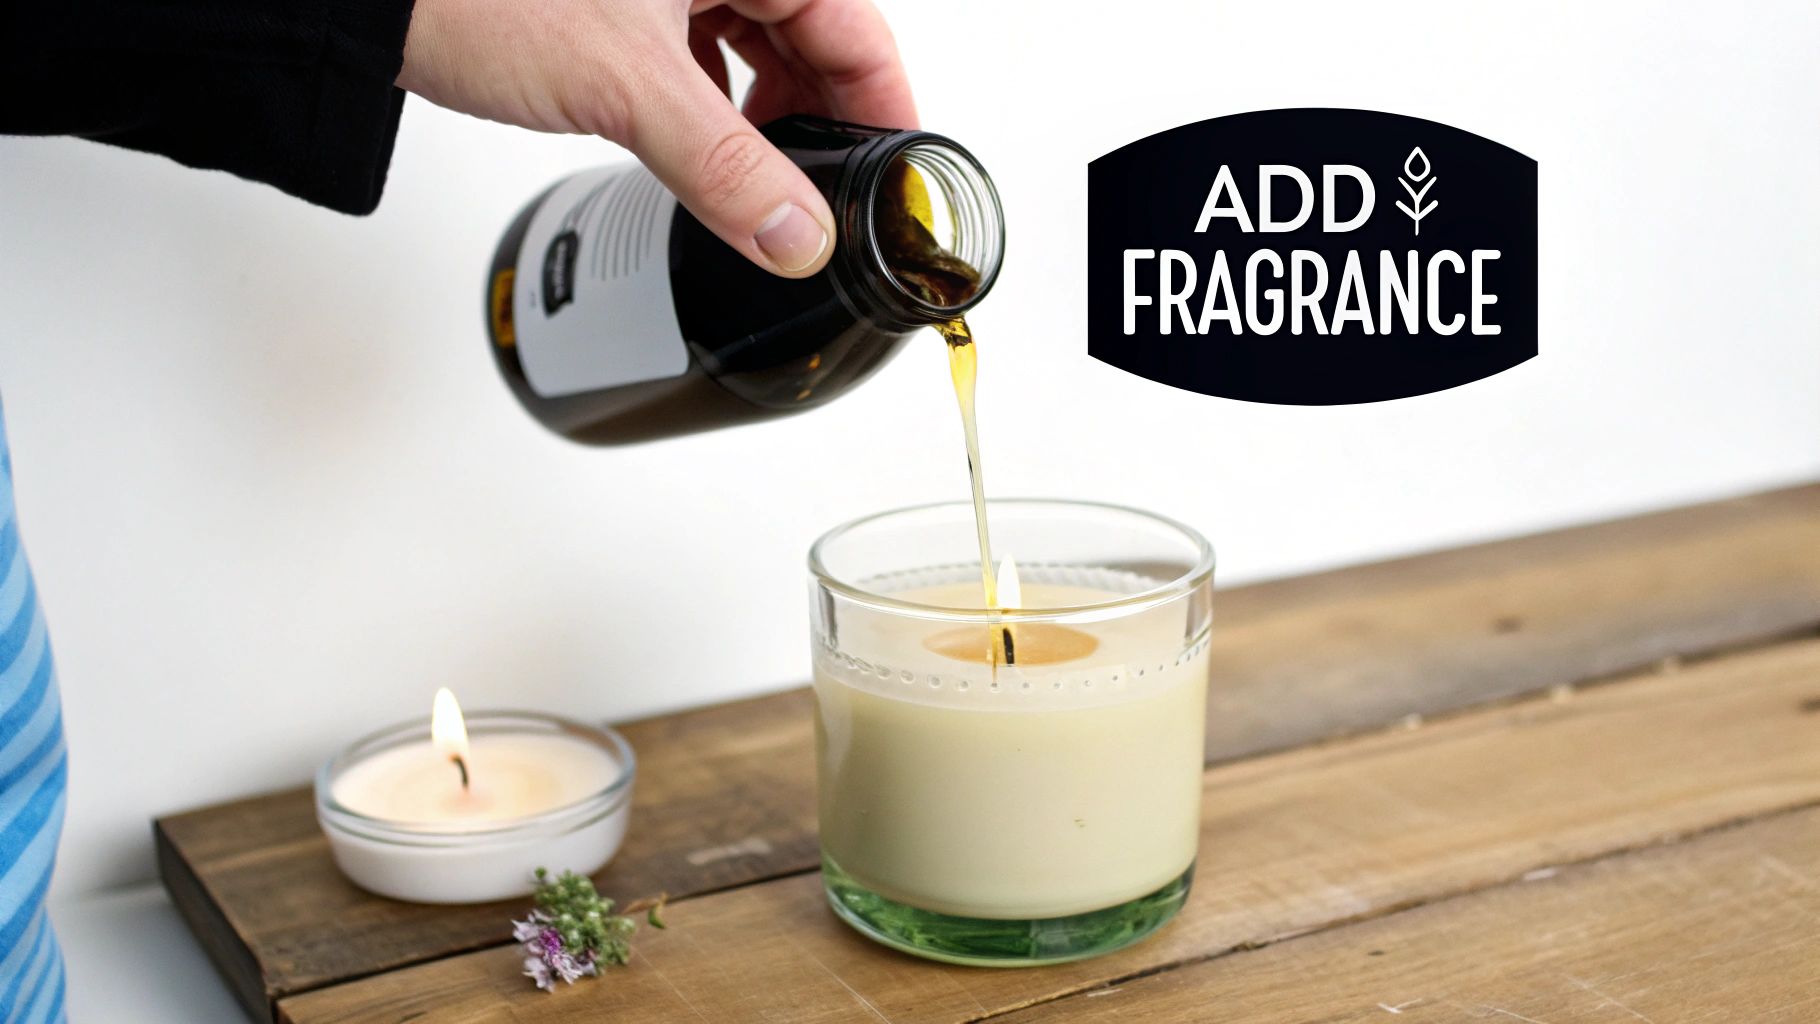
Infusing Your Wax with Fragrance
Now that your wax is perfectly melted and at the right temperature, it's time to add your fragrance oil. This is the step that gives your candle its unique character. The amount of fragrance oil you use is called the fragrance load.
Most soy waxes are designed to handle a fragrance load between 6% and 10% of the total wax weight. So, if you're working with one pound (16 oz) of wax, you'll need between 1 oz and 1.6 oz of fragrance oil. It's always a good idea to double-check the recommendations from your wax supplier, as this can vary.
Pour your fragrance oil into the melted wax and stir—and I mean really stir. You need to gently but thoroughly mix for a full two minutes. It might feel like a long time, but this step is non-negotiable. It ensures the oil and wax molecules fully bond, which is what gives you that amazing scent when you finally light your candle.
To help you visualise these first few crucial steps, here’s a look at the process from measuring to melting.
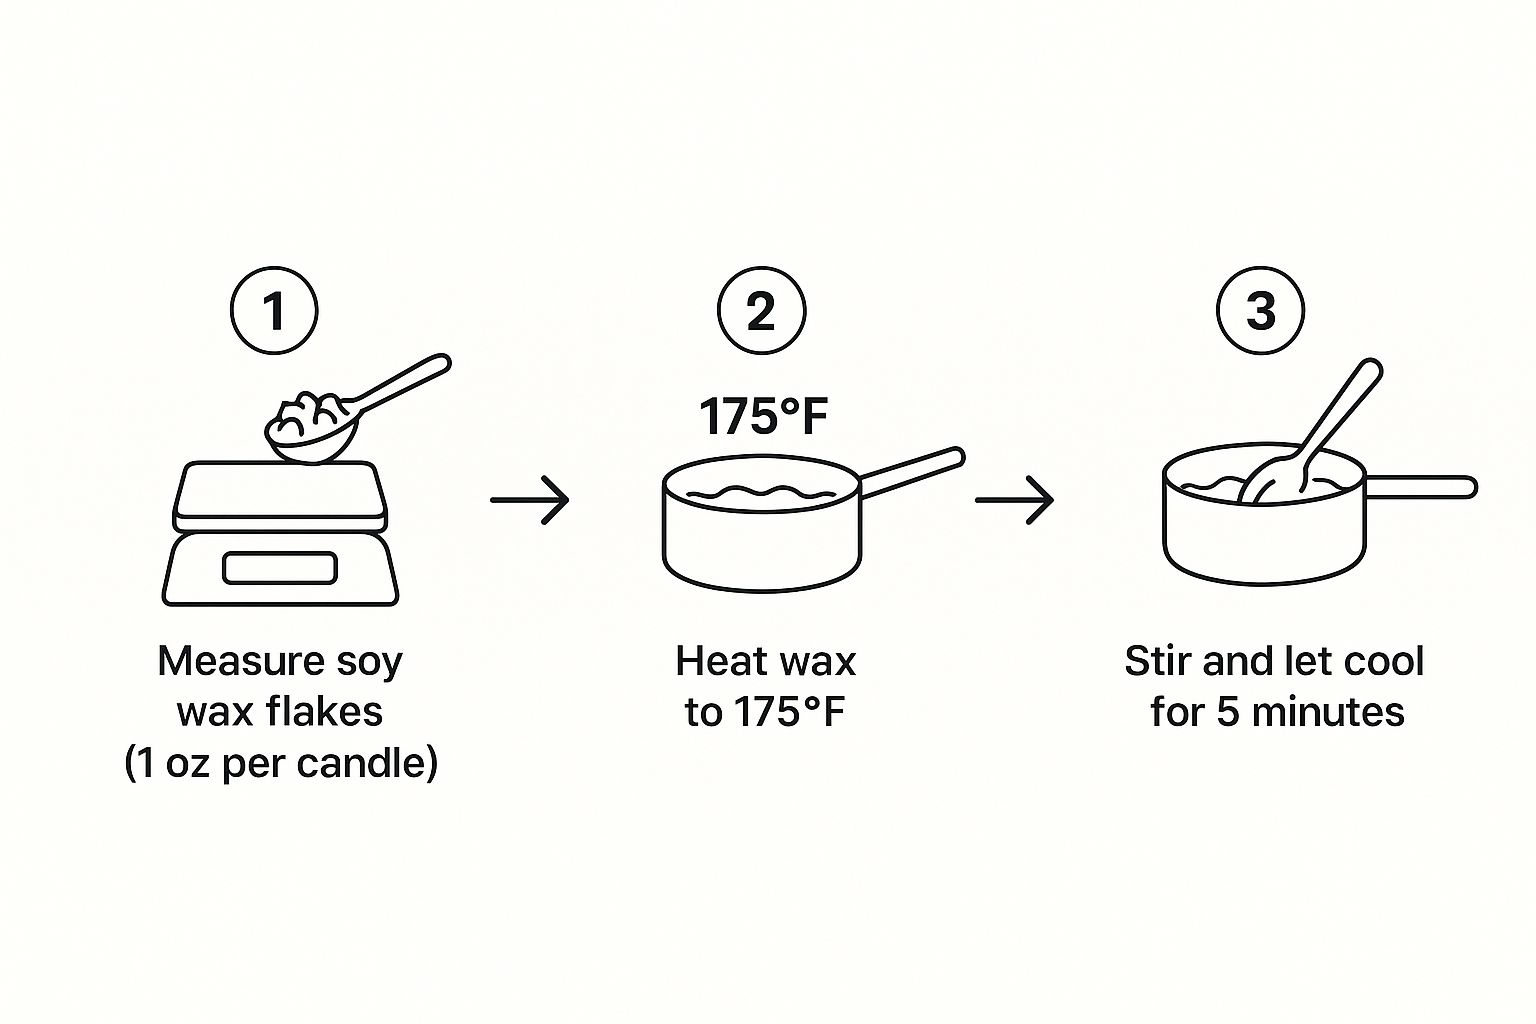
As you can see, precision is everything. Getting your measurements, temperatures, and timing right is what separates a simple homemade craft from a truly professional-quality candle.
This attention to detail has helped turn a beloved hobby into a massive industry. In fact, annual candle sales in the U.S. alone reach about $3.14 billion. And while you might think it's all about the holidays (35% of sales), the majority of purchases (65%) happen all year long. People want that cozy ambiance every day, which keeps soy candles in constant demand.
If you've followed all the steps and still find your candles aren't as fragrant as you'd like, don't worry. It happens! It could be anything from the type of oil you used to your curing time. For a deeper dive into troubleshooting, check out our guide on how to make your candles smell stronger. It's packed with tips I've learned over the years to perfect your scent throw.
Achieving the Perfect Pour and Cure
This is the moment of truth. The pour is that final, delicate action that really defines the quality and appearance of your finished candle. Getting it right is the secret to avoiding those all-too-common frustrations—sinkholes, cracks, and bumpy tops—and achieving that flawlessly smooth surface we're all after.
Preparing for the Perfect Pour
Before a single drop of wax enters your jars, they need to be prepped and ready. Here’s a little trick that makes a huge difference: gently warm your containers just before you pour. A quick wave with a heat gun on low, or even popping them in a warm oven (around 65°C) for a few minutes, does the job perfectly.
Why bother? This small step encourages the wax to cool more slowly once it's in the jar. This drastically reduces the chances of wet spots (where the wax pulls away from the glass) and helps it stick beautifully. It’s a pro move that yields noticeably better results.
Next, make sure your wick is perfectly secured and dead-centre. If it’s even slightly off, your candle will burn unevenly and start to tunnel. I can't stress this enough. Use a wick centring tool or even a simple clothespin to hold it taut and straight while you pour.
The Ideal Pouring Temperature
Once your fragrance oil is stirred in, you need to exercise some patience. The wax has to cool down before it's poured into the container. One of the most common mistakes I see beginners make is pouring the wax when it's way too hot. This shock-cools the wax and almost always results in surface flaws like cracks and sinkholes.
For most soy waxes designed for containers, the sweet spot for pouring is right around 135°F (57°C). Letting the wax cool from 185°F all the way down to this temperature allows it to thicken up just enough for a smooth, controlled pour. Don't guess—your thermometer is your best friend here.
When it's time, pour slowly and steadily. If you rush it, you’ll introduce air bubbles that will rise to the top and mar the surface. A slow, consistent stream is what you’re aiming for.
The Science and Art of Curing
The candles are poured, but your work isn't quite done. Now comes the curing process—a crucial waiting period where the real magic unfolds. Curing is when the fragrance oil molecules fully bind with the crystalline structure of the soy wax, creating a stable, wonderfully scented candle.
Think of it like aging a fine wine or cheese. Sure, you could light your candle after 24 hours, but it hasn't reached its full scent potential yet.
A full cure is what separates a candle that simply looks good from one that smells incredible. This patient waiting period is the final step in crafting a high-quality candle with a rich, powerful scent throw that can fill a room.
So, how long do you have to wait?
- Minimum Cure Time: I recommend letting your soy candles sit for at least 3-4 days before you even think about lighting one up for a test burn.
- Recommended Cure Time: For the absolute best scent throw, a full cure of one to two weeks is the gold standard.
Find a cool, dark spot with a stable temperature to store your candles during this time. Keep them away from direct sunlight or drafts. This patient process is a non-negotiable part of learning how to make candles with soy wax that can stand up against premium brands. It’s the final touch that ensures all your careful work truly pays off.
Fixing Common Soy Candle Problems
Even when you’ve followed every step to the letter, soy wax can sometimes have a mind of its own. It's easy to get discouraged, but trust me, most of these little quirks are simple to fix and even easier to prevent once you know what to look for. Think of these imperfections not as failures, but as the wax trying to tell you something.
This is your personal troubleshooting guide for turning those small frustrations into stunning, professional-looking candles. We’ll walk through the most common challenges you’ll run into as you learn how to make candles with soy wax.
Tackling Frosting and Wet Spots
Two of the most frequent cosmetic issues you’ll encounter are "frosting" and "wet spots." While they might look a bit off, neither one actually affects how your candle burns or throws its scent. They're just aesthetic hiccups.
Frosting shows up as chalky, white crystals on the surface or sides of your candle. This is a completely natural trait of 100% soy wax—it’s just the wax trying to return to its original crystalline state. This usually happens when the temperature fluctuates too much while the candle is cooling.
Wet spots, on the other hand, are those dark, damp-looking patches you see against the glass. They happen when the wax shrinks as it cools, pulling away from the container. Both of these are purely cosmetic and can be managed with better temperature control.
Solutions for a Flawless Finish
Here are a few practical tricks I've learned over the years to get that perfectly smooth, professional look you're aiming for.
- Warm Your Jars: As we talked about earlier, pouring wax into a cold jar is a surefire way to get wet spots. Gently warming your containers before pouring helps the wax and glass cool down together, which really improves how well the wax sticks.
- Pour at a Lower Temperature: Pouring your wax when it’s too hot can shock the wax as it hits the cooler jar, leading to both frosting and wet spots. Aiming for that sweet spot of 135°F (57°C) makes a world of difference.
- Control the Cooling Environment: Let your candles set up in a warm, draft-free room where the temperature is stable. Never place them directly on a cold countertop like granite or marble. A wooden board or even a few layers of paper towels underneath will provide enough insulation.
Fixing Uneven Surfaces and Candle Tunnelling
What about when the top of your candle isn’t perfectly smooth, or it burns unevenly? Don’t worry, these are also completely fixable. A bumpy or cracked top can be smoothed over in seconds with a heat gun on its lowest setting. A quick pass melts the surface just enough to let it reset beautifully.
Candle tunnelling—that annoying habit where the wick burns straight down the middle, leaving a wall of unused wax—is almost always caused by a wick that’s too small or by not letting the first burn go long enough. For a deeper look at solving this common problem, check out our guide on how to fix candle tunnelling and restore perfect burns.
Learning to troubleshoot is a key part of the craft, empowering you to create consistently beautiful candles. As the demand for high-quality, eco-friendly candles grows, these skills become even more valuable.
This growing interest is clearly reflected in market trends. The global candle market is projected to reach $8 billion by 2031, and container candles like the ones you're making account for about 45% of those sales. Soy wax is a massive part of this growth, prized for its clean-burning nature and eco-friendly reputation.
Your Soy Candle Making Questions, Answered
As you get your hands waxy and start pouring, you’re bound to run into a few questions. It happens to everyone! Think of this as your go-to cheat sheet for navigating those common little puzzles that pop up for new candle makers.
We’ve all been there, and having a few quick answers can save you a lot of frustration. Let's dig into some of the most common things people ask when working with soy wax.
Why Is the Top of My Soy Candle Bumpy?
This is the big one. You pour a seemingly perfect candle, walk away, and come back to a lumpy, crater-filled surface. It’s one of the most common quirks of working with natural soy wax, and it’s almost always caused by the wax cooling down too quickly or unevenly. The great news? It’s purely cosmetic and incredibly easy to fix.
Grab a heat gun and set it to low. A gentle pass over the top is all it takes to melt that top layer, letting it reset into a smooth, professional finish. To avoid this next time, try pouring your wax at a slightly cooler temperature. Also, make sure your candles are cooling in a warm, draft-free spot away from open windows or air-con vents.
How Much Fragrance Oil Should I Add to Soy Wax?
Getting the scent just right is probably why you started making candles in the first place. The amount of fragrance you add is called the "fragrance load," and getting it right is crucial. For most soy waxes, the sweet spot is a fragrance load between 6% and 10% of the total wax weight.
So, what does that look like in practice?
- If you're using 1 pound (16 oz) of wax, you’ll want to add between 1 oz and 1.6 oz of fragrance oil.
- Crucially, always measure by weight, not volume. Your kitchen scale is your best friend here for both the wax and the oil.
Always double-check the specs from your wax supplier. Some soy blends are formulated to hold more fragrance, but sticking to the recommended ratio is your best bet for a candle that smells amazing without any issues.
What’s the Magic Temperature for Adding Fragrance and Pouring?
In candle making, temperature is everything. While there’s some variation between soy wax brands, here’s a method that has consistently worked for me and countless other makers. Heat your wax to 185°F (85°C).
Once it hits that temperature, take it off the heat. This is when you'll add your fragrance oil. Pour it in and stir gently but thoroughly for a full two minutes. Seriously, set a timer. This step is what ensures the fragrance oil molecules properly bind with the wax.
After stirring, let the wax cool down to about 135°F (57°C) before you pour it into your containers. Pouring cooler is the secret weapon against sinkholes and cracks, and it gives you that beautiful, smooth adhesion to the glass.
How Long Does My Soy Candle Really Need to Cure?
I know it's tempting to light your new creation right away, but patience is a key ingredient here. Your candle will be solid and technically burnable within 48 hours, but it hasn’t reached its full scent potential. Curing is the process where the fragrance oil fully disperses and integrates throughout the wax.
For the absolute best scent throw—that room-filling aroma you're after—you need to let your soy candles cure for a full one to two weeks. Trust me, this waiting period makes a world of difference. It's the final step that transforms a good candle into a great one.
Ready to skip the DIY and experience perfectly crafted soy candles? At Shivora Candles, we've perfected every step of the process for you. Explore our collections of luxurious, clean-burning soy candles at https://shivoracandles.com.

