
How to Make a Soy Wax Candle: Easy Step-by-Step Guide
There's something incredibly satisfying about making your own soy wax candles. The process itself is a mindful ritual, broken down into a few key moments: gathering your supplies, melting the wax to just the right temperature, blending in your chosen fragrance, and finally, that careful pour into a waiting container.
But the real magic? It's hidden in the details—things like precise temperature control and giving your candle enough time to cure. That's what unlocks a truly powerful scent throw.
The Art of Crafting Your Own Soy Candles
There’s a special kind of joy that comes from lighting a candle you poured with your own hands. It’s more than just a craft; it's a way to create personalized, eco-friendly decor that fills your home with a unique warmth and fragrance.
Choosing to work with soy wax is a fantastic starting point, especially if you're new to candle making. Unlike paraffin, a byproduct of petroleum, soy wax comes from soybeans, a completely renewable resource. Right away, you're making a more sustainable and environmentally friendly choice.
Why Choose Soy Wax?
Beyond its green credentials, people are drawn to soy for very practical reasons. It gives you a much cleaner burn, producing significantly less soot than old-school paraffin candles. That means the air in your home stays cleaner, and you won't get those dark smudges on your walls or containers.
Soy wax also has a lower melting point, which makes it safer and a bit more forgiving to handle when you're first learning. Curious to learn more? We explore all the details in our guide on the beauty of natural soy wax.
The move toward soy wax isn't just a niche trend among crafters. It's a major market shift. People are now actively looking for products that align with their personal values around wellness and sustainability.
This consumer-driven change is backed by real numbers. The North American candle market, for example, is projected to hit revenues of $8.0 billion by 2031, largely because of this growing appetite for cleaner, natural candle options. You can dive deeper into the data on the growing candle market trends on virtuemarketresearch.com.
In this guide, I'll walk you through every stage of the process, showing you that making a beautiful, richly scented candle is something you can absolutely achieve. We’ll break down the steps and share the practical tips I've learned over the years to help you create something you can be truly proud of.
Getting Your Candle Making Supplies Together
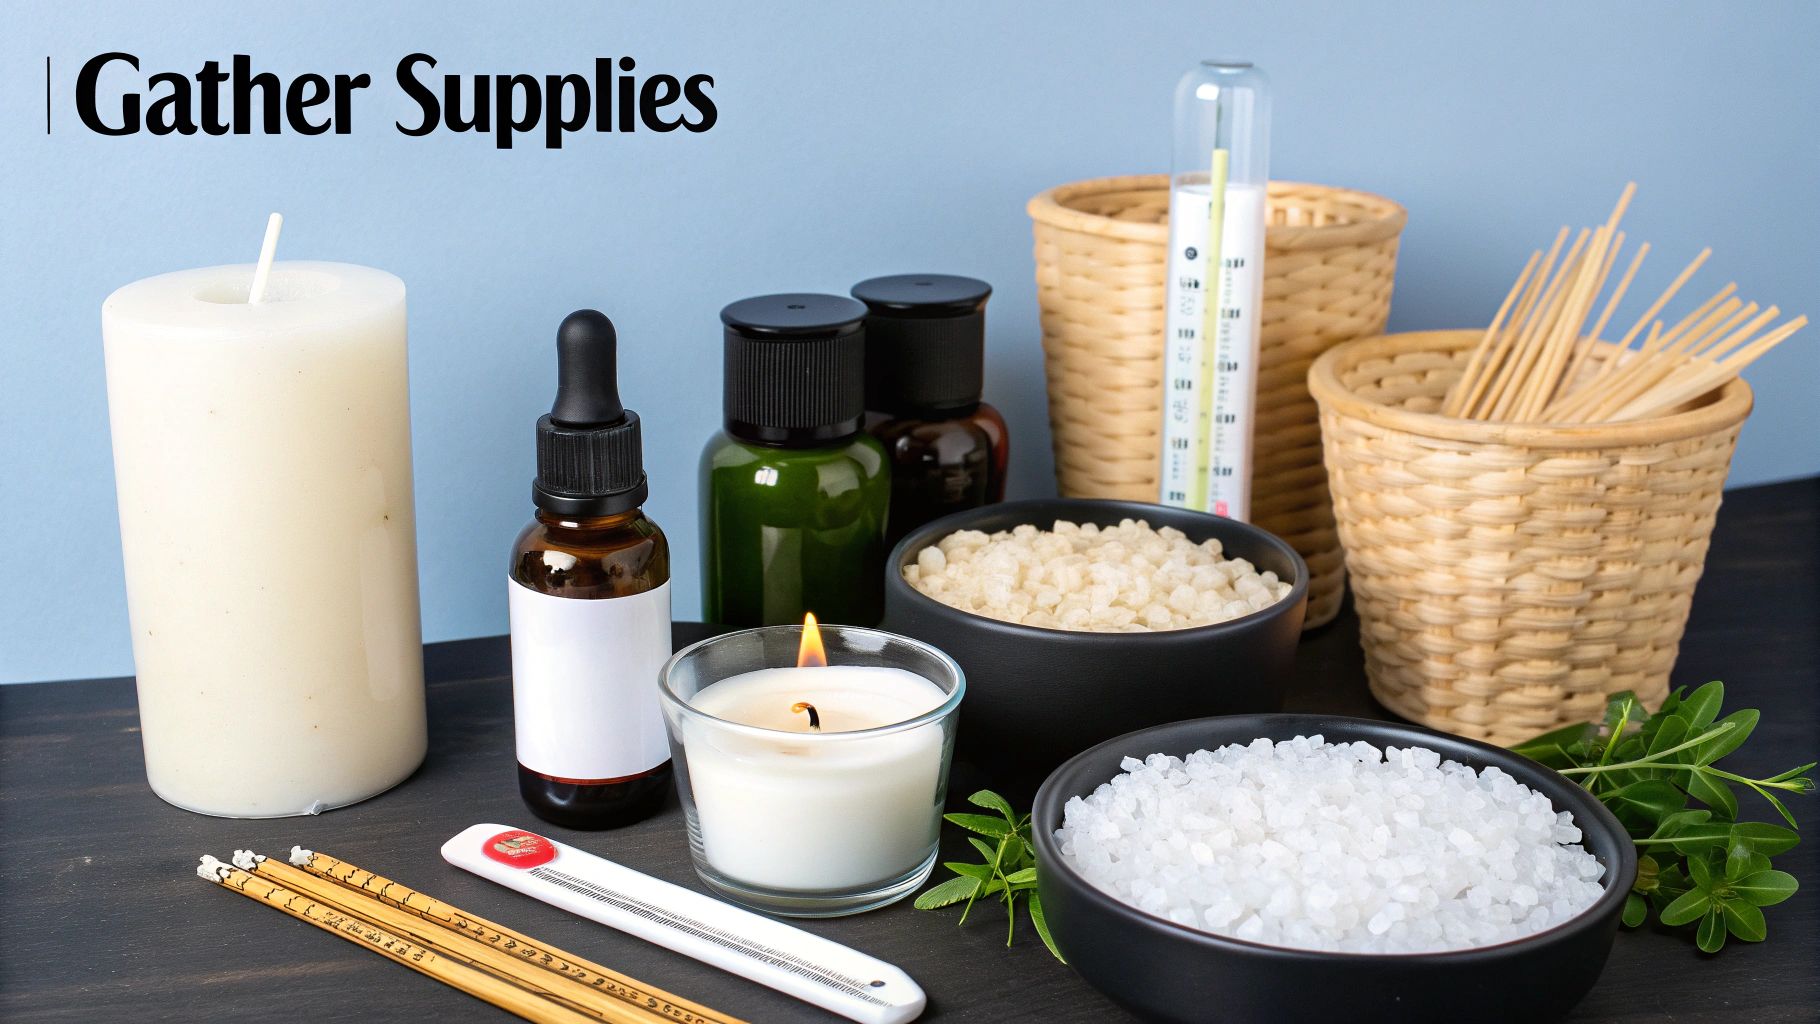
Before you can get lost in the wonderful process of pouring your first candle, you need to gather your gear. This is your creative toolkit, and having the right supplies on hand makes everything easier and, more importantly, directly affects how your final candle turns out.
You don't need a high-tech lab to get started. In fact, you'll probably find a few useful items hiding in your kitchen cupboards. That said, a few key pieces are non-negotiable if you want to craft a safe, beautiful, and great-smelling soy wax candle.
The Heart of Your Candle: Wax, Wicks, and Fragrance
The soul of any candle boils down to three things: the wax, the wick, and the fragrance. Making the right choices here is what elevates a candle from just "okay" to absolutely fantastic.
-
Soy Wax Flakes: Not all soy wax is created equal. Container wax is specifically formulated to be a bit softer, which helps it cling nicely to the sides of jars. Pillar wax, on the other hand, is much harder and is designed to stand on its own after being removed from a mould. For this guide, we're sticking with container wax.
-
Wicks: This is where many beginners stumble. The wick's size must match your jar's diameter. If your wick is too small, it will "tunnel"—burning straight down the middle and leaving a frustrating amount of wax on the sides. A wick that’s too big is a safety hazard, creating a massive flame and a lot of soot.
-
Fragrance Oils: Always look for high-quality fragrance oils made specifically for candle making. These are engineered to bind properly with soy wax, which is crucial for getting a strong, consistent scent (what we call "scent throw") when you finally light your creation.
The Tools of the Trade
Now that you've got your core materials sorted, you need a few tools to put it all together.
Before we dive into the list, here's a little table to keep things organized. Think of this as your shopping list for becoming a candle maker.
Your Essential Candle Making Toolkit
| Item | Purpose | Beginner's Tip |
|---|---|---|
| Digital Scale | For accurately measuring wax and fragrance oil by weight. | Don't eyeball it! Precision is the key to consistency and replicating your successes. |
| Pouring Pot | A dedicated pot (usually with a spout) for melting wax. | An old, clean saucepan works, but a pouring pot makes for a much cleaner pour. |
| Double Boiler | A larger pot to hold water for gently melting the wax. | Never melt wax directly on the heat source. A double boiler prevents scorching. |
| Digital Thermometer | To monitor the wax temperature for adding fragrance and pouring. | This is a non-negotiable tool. Guessing temps leads to weak scents and poor finishes. |
| Wick Centering Tool | Holds the wick perfectly straight and in the centre while the wax sets. | A simple clothespin laid across the jar's mouth can work in a pinch. |
| Stirring Utensil | To gently mix the fragrance oil into the melted wax. | A bamboo skewer or a silicone spatula works great. Avoid wooden spoons. |
Sourcing your materials from a reliable place is always a good idea. To help you get started, we've put together a handy list of our favourite top supplies for making candles.
A common mistake I see beginners make is guessing temperatures. A simple digital thermometer is your best friend here. It removes all the guesswork, ensuring you add your fragrance and pour the wax at the perfect moments for a strong scent and a smooth, professional-looking top.
You’ll see that the preference for high-quality, natural materials isn't just a niche trend; it's a huge driver in the market. In places like California, which makes up 15% of all U.S. candle sales, the demand for soy wax candles is growing by about 12% every year. It’s clear people want better, more natural products in their homes.
Setting Up Your Workspace for Success
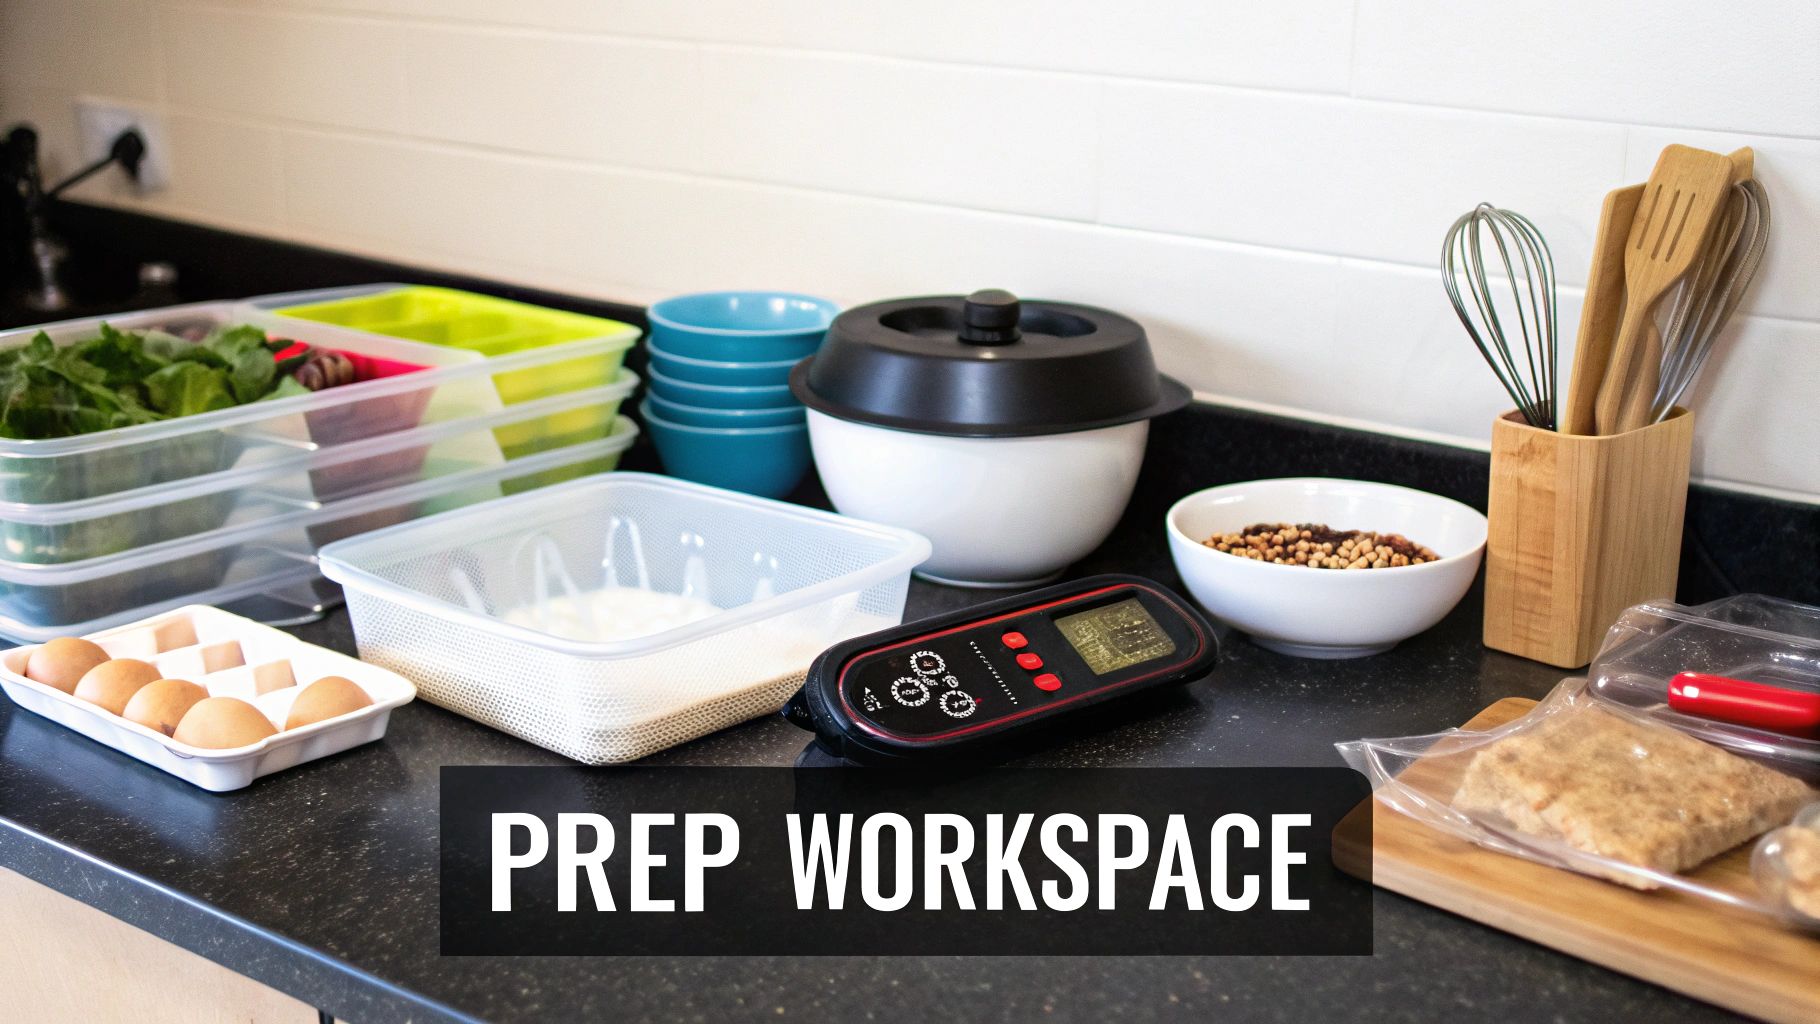
Before you even think about melting a single flake of wax, you need to get your workspace in order. This isn't just about being tidy—a well-prepared space is your secret weapon for a smooth, stress-free candle-making session. It’s the difference between a creative flow and a chaotic mess.
First things first, protect your surfaces. Hot wax has a way of getting everywhere, and scraping it off benchtops is no fun. I always lay down old newspapers or a reusable silicone mat. It’s a simple step that saves a major headache later.
Good ventilation is also key. While soy wax is wonderfully clean-burning, heating fragrance oils can release some pretty strong scents. Crack open a window or switch on an exhaust fan to keep the air clear and prevent your nose from being overwhelmed.
Prepping Your Materials
With your space protected, it’s time to get your supplies ready. Think of this as your mise en place for candle making. A little prep work here makes the whole process feel seamless.
- Clean Your Containers: Your jars need to be spotless. Wash them with warm, soapy water and make sure they are bone dry. Any speck of dust or lingering moisture can cause wet spots or prevent the wax from adhering properly to the glass.
- Secure Your Wick: This is non-negotiable for a safe, even burn. Most wicks come with a little sticker tab on the bottom. Peel it off and press the wick firmly into the absolute centre of your jar. No sticker? A small dot of hot glue does the trick just as well.
- Centre the Wick: After anchoring the base, pull the wick taut and straight. A wick-centring tool is great for this, but honestly, a simple clothespin laid across the rim of the jar works perfectly. The goal is to keep that wick dead centre while you pour.
Calculating Your Wax Needs
"How much wax do I need?" This is probably the number one question I get. If you guess, you’ll either end up with wasted wax or a half-full candle. Luckily, there’s a foolproof way to figure it out.
A good rule of thumb I’ve always used is that the weight of the wax flakes you need is roughly double the volume of your container.
For example: If you have a jar that holds 8 ounces (227 grams) of water, you’ll need about 16 ounces (454 grams) of soy wax flakes by weight.
Why the difference? Soy flakes are light and airy, taking up much more space than when they’re melted down into a dense liquid. Always use a digital scale for this—measuring by weight is far more accurate than using a measuring cup. Getting this right ensures you melt the perfect amount for a full, professional-looking candle every single time. It's a small detail that truly elevates your finished product.
Melting and Scenting Your Soy Wax
This is where the magic really happens. You’ve got your station set up, your materials are ready to go, and now it's time to turn those solid soy flakes into the fragrant, liquid gold that will become your candle. The whole secret to this part? Slow, gentle heat and paying close attention to your thermometer.
First things first, you'll need a double boiler. If you don't have a dedicated one, no problem—you can easily rig one up. Just place your pouring pot (or another heat-safe bowl) inside a larger saucepan that has a few inches of water in it. Whatever you do, never melt your wax directly on the heat source. This is a fast track to scorching the wax, which can ruin its colour, texture, and scent-holding ability.
Get the water in the larger pot to a gentle simmer, not a furious boil. Add your measured soy wax flakes to the pouring pot and just let the warm water work its magic. Think of it like melting high-quality chocolate; you can't rush it if you want that perfectly smooth, creamy consistency.
Getting the Temperature Just Right
As the wax starts to melt, give it an occasional stir with a silicone spatula or even a bamboo skewer. This helps break up any stubborn clumps and makes sure everything melts evenly. Once the wax is completely liquid and clear, it's time for your most important tool in this phase: your digital thermometer.
Nailing the temperature for adding your fragrance is the make-or-break step for a candle that actually fills a room with scent. If you add your fragrance oil when the wax is scorching hot, you’ll burn off all those beautiful top notes before they even have a chance. The scent will just evaporate into thin air, leaving you with a disappointing, weak candle. On the flip side, if the wax is too cool, the oil won't bind properly with the wax, resulting in an oily mess that separates.
Pro Tip: For most soy waxes, the sweet spot for adding fragrance is between 80°C and 85°C (176°F and 185°F). I always take my wax off the heat and let it cool down to this range before pouring in my fragrance oil.
Once the oil is in, stir gently but consistently for a full two minutes. I know, it feels like an eternity when you're excited to pour, but this is non-negotiable. It's the only way to ensure the fragrance oil and wax molecules fully bond together.
The image below gives you a nice visual of the basic flow, from melting the wax to letting it cool down a bit.
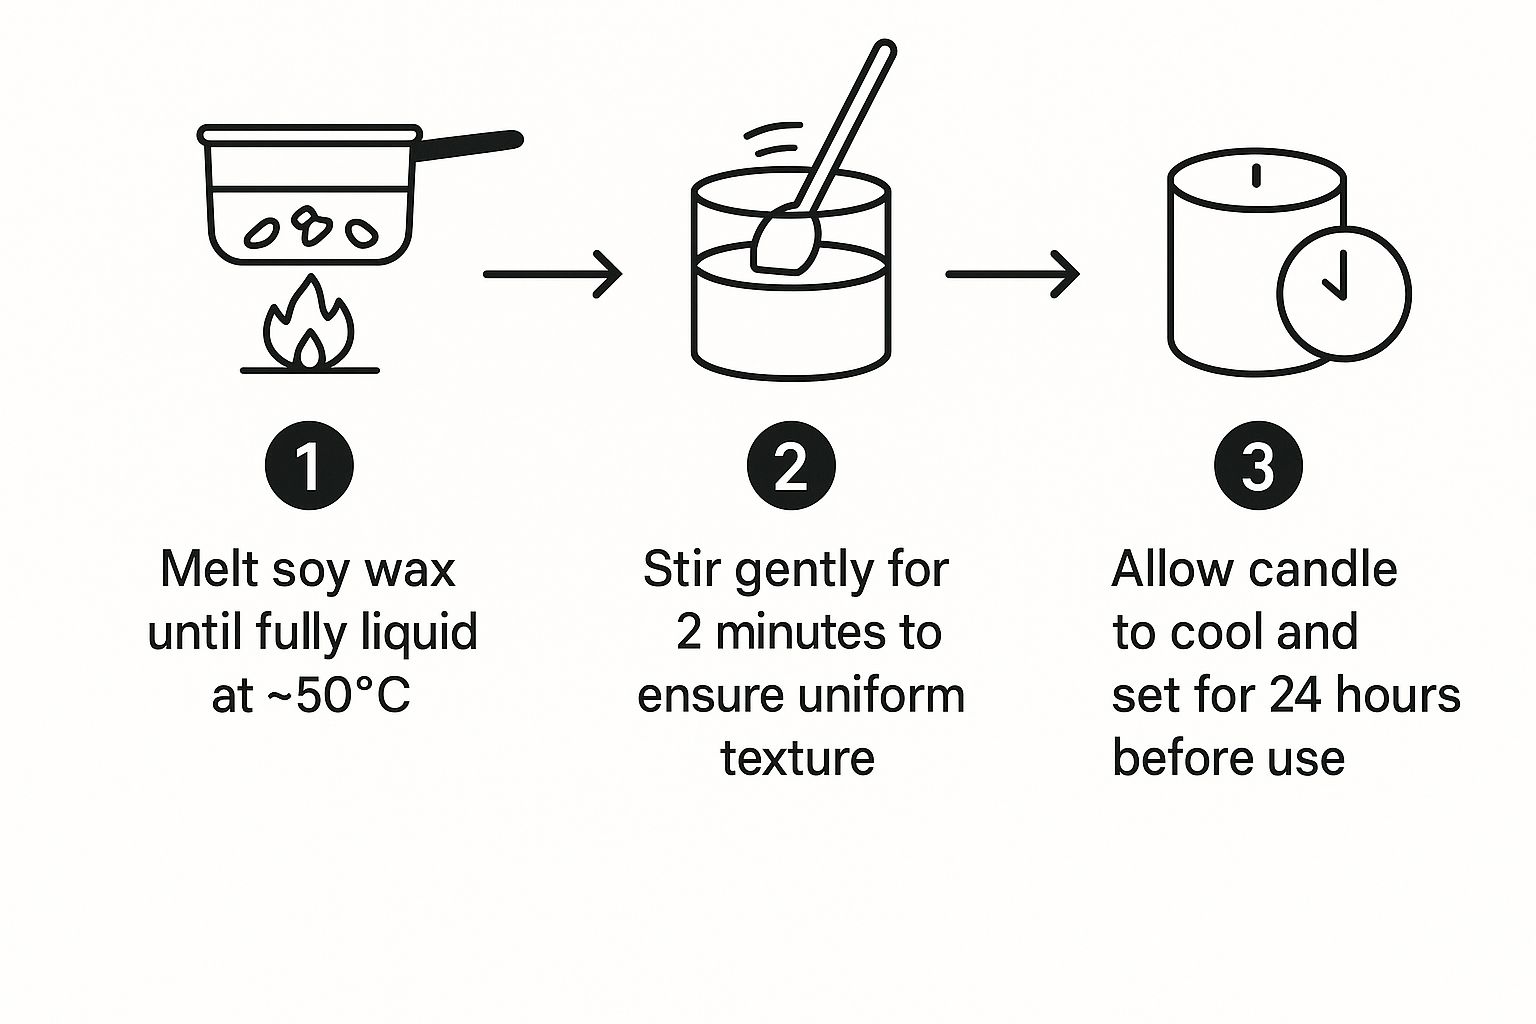
It’s a good reminder that each part of the process—melting, stirring, and cooling—is a distinct step you need to get right for a quality candle.
Calculating Your Fragrance Load
"Fragrance load" might sound a bit technical, but it’s really just the ratio of fragrance oil to wax. Getting this balance right is what gives you a candle with a beautiful scent that's present but not headache-inducing. For soy wax, a fragrance load of 6% to 10% by weight is the industry standard and a great place to start.
Here’s a quick and easy way to figure it out:
- First, weigh your soy wax in grams (let’s say you have 450g).
- Next, decide on your fragrance percentage (we'll go with 8% for this example).
- Now, just multiply the wax weight by that percentage: 450g x 0.08 = 36g.
- That’s it! You'll need to add exactly 36 grams of your chosen fragrance oil.
This kind of precision is what separates hobbyists from artisans. In my experience, and from what I've seen from successful candle makers, using a 100% soy wax with a fragrance load between 6% and 10% is the key. This range consistently delivers a fantastic scent release (what we call "hot throw") without compromising the smooth tops of the candles. You can read more about trends in the North American candle market on globenewswire.com.
After you've stirred in your fragrance for those crucial two minutes, you'll let the wax cool down just a little more before we move on to the big moment: the pour.
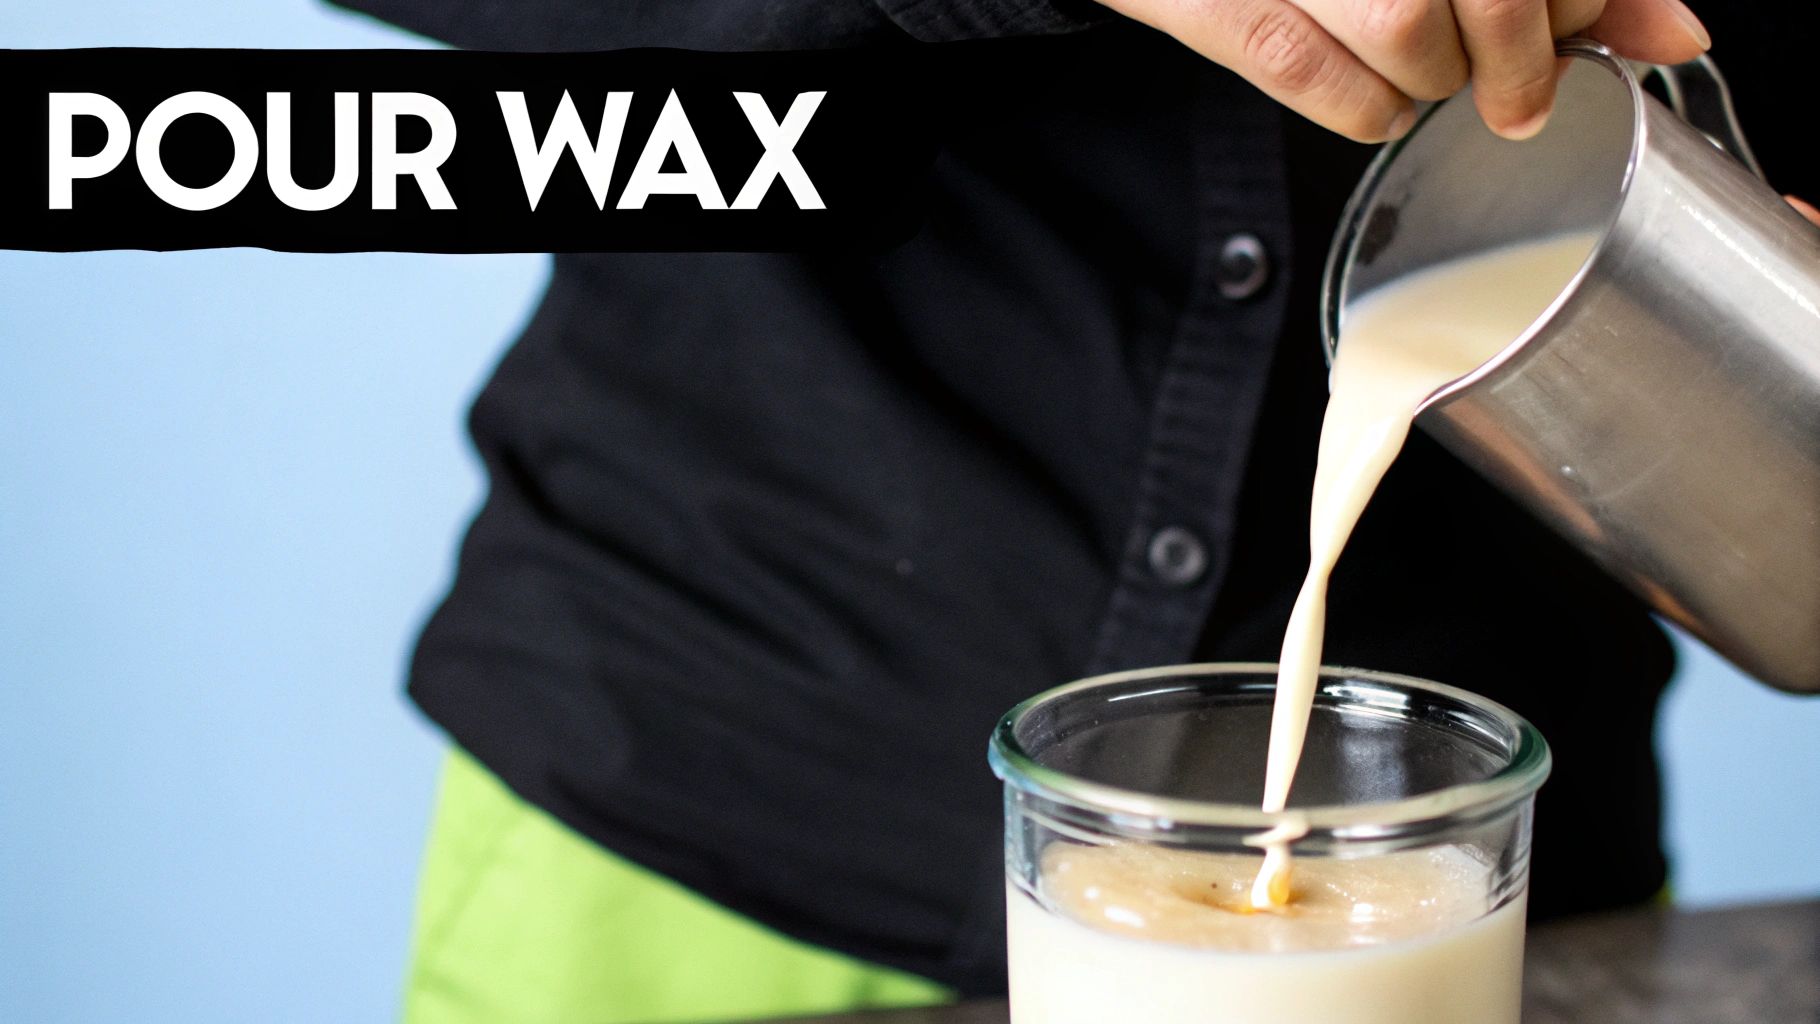
Pouring and Curing for a Perfect Finish
We've reached the final, and arguably most satisfying, stage of the process. Pouring the wax and letting it cure is where all your careful preparation comes together. This is the moment that truly separates a decent homemade candle from a fantastic one.
After letting your scented wax cool for a few minutes, it's time to pour. The key here is a single, steady motion. Don't rush it. Rushing is probably the most common mistake I see, and it almost always introduces air bubbles that can ruin the look of your candle's surface.
Think of it like pouring warm honey—you want a consistent, gentle stream. This approach prevents splashing and helps the wax settle evenly into the container. I always aim to leave about a half-inch of space at the top of the jar. This little bit of breathing room is crucial to prevent the melt pool from overflowing once the candle is lit.
Right after you’ve poured the wax, give your wick a quick check. Even with a trusty centring tool, the force of the pour can sometimes knock it slightly off-kilter. Gently nudge it back to the dead centre of the container. A perfectly straight wick is non-negotiable for a clean, even, and safe burn down the road.
The Curing Process: Why Patience Is Everything
And now for the toughest part of making soy wax candles: waiting. This is called the curing process, and it's absolutely essential if you want a candle with a professional-quality scent throw. Find a cool, dry spot for your new candles, away from any direct sunlight, and let them sit undisturbed.
So, why all the fuss about waiting?
- Fragrance Binding: Curing is when the fragrance oil and wax molecules truly get to know each other. They need time to fully bond and integrate. I always compare it to marinating a good steak—the longer it sits, the more flavourful the final result. The same principle applies here.
- Crystal Formation: Soy wax is a natural product. As it cools and solidifies, it forms crystalline structures. A slow, uninterrupted cure gives these crystals the time they need to form correctly, which leads to a stronger candle with that beautiful, smooth top we're all after.
Curing is the final, silent step where the real magic happens. It’s what transforms a simple mixture of wax and oil into a true aromatic experience. Rushing this process is like taking a cake out of the oven too early—it might look done, but the inside just isn’t right.
For soy wax, the recommended curing time is anywhere from one to two weeks. Yes, your candle will feel hard to the touch after just a few hours, but trust me, it’s not finished developing. A one-week cure will produce a nice scent, but I've found that waiting the full two weeks almost always yields a richer, more complex fragrance. This patience ensures both the "cold throw" (the scent of the unlit candle) and the "hot throw" (the scent when burning) are as powerful as they can be. It’s the secret to a candle that doesn't just smell good, but impressively fills a room.
Troubleshooting Common Candle Making Issues
So, you’ve followed all the steps, but your finished candle isn't quite what you pictured. Don’t get discouraged! Even seasoned candle makers run into a few quirks now and then. This is all part of the learning curve, and honestly, figuring out what went wrong is how you truly master the craft.
Most of these little imperfections are surprisingly easy to fix once you can pinpoint the cause. Let's walk through some of the most common issues you'll encounter with soy wax and how to get that smooth, professional finish you’re aiming for.
Tackling Aesthetic Flaws
Two of the most common gripes for new candle makers are frosting and wet spots. While they can be a bit frustrating when you want a flawless look, they're both completely natural characteristics of soy wax and won't affect the candle's performance.
Frosting
You'll know it's frosting when you see little white, crystalline patterns on the surface or sides of your candle. It's a hallmark of 100% natural soy wax, essentially a sign that you’re working with the real deal.
- What causes it? Frosting usually happens when the wax cools down too quickly, which encourages these tiny crystals to form.
- How do you fix it? Try gently pre-warming your candle jars before you pour. Pouring your wax at a slightly lower temperature can also help by encouraging a slower, more even cooling process.
Wet Spots
These aren't actually wet at all. They look like dark, damp patches where the wax seems to have pulled away from the glass. What you're seeing is an air pocket created by wax shrinkage as it cools and solidifies.
- What causes it? This is often a temperature issue. If your glass containers are too cold, or the room itself is drafty, the wax will cool and shrink away from the sides too fast.
- How do you fix it? Make sure your jars are clean and at room temperature before pouring. A warm, draft-free room really does make all the difference.
A quick note from experience: Don't stress too much about these cosmetic quirks. Both frosting and wet spots are purely visual and have zero impact on how your candle burns or smells. Part of the beauty of handmade products is embracing their unique character!
Solving Burn Problems Like Tunneling
While visual flaws are one thing, burn problems can genuinely ruin a candle experience. The biggest and most frustrating issue by far is tunneling.
Tunneling is when the wick burns straight down the middle, leaving a thick wall of unused wax around the edge of the jar. It’s a huge waste of wax and fragrance, and it drastically cuts your candle's lifespan.
Nine times out of ten, the culprit is an incorrectly sized wick. If the wick is too small for the diameter of your container, it simply can’t generate enough heat to melt the wax all the way to the edges.
To get ahead of this, always check the wick-sizing guide from your supplier. Matching the wick to your jar's diameter is probably the single most important step for ensuring a perfect burn.
Even the best of us end up with a tunneled candle sometimes. Don't toss it! We have a complete guide that shows you how to fix candle tunneling and restore perfect burns, so you can rescue your creation and enjoy every last bit of it.
A Quick Diagnostic Guide
Sometimes you just need a quick reference to figure out what’s going on. I've put together this table to help you diagnose and solve the most common soy candle issues at a glance.
| Fixing Common Soy Candle Flaws | ||
|---|---|---|
| Problem | Potential Cause | How to Fix It |
| Rough, bumpy tops | Air bubbles escaping as the wax cools; pouring temperature too high or low. | Pour wax slowly to minimize air bubbles. Try pouring at a slightly higher temperature and use a heat gun on the surface immediately after pouring. |
| Frosting (white crystals) | Wax cooling too quickly; a natural trait of soy wax. | Pre-warm your containers. Pour the wax at a lower temperature (around 135°F or 57°C) to encourage slower cooling. |
| Wet spots (adhesion issues) | Wax shrinking away from the glass due to rapid cooling. | Ensure jars are clean and at room temperature. Work in a warm, draft-free environment. |
| Tunneling | Wick is too small for the container's diameter. | Always use a wick-sizing chart from your supplier to match the wick to the jar diameter. Ensure the first burn lasts long enough to melt the wax to the edges. |
| Weak scent throw | Not enough fragrance oil used; oil added at the wrong temperature; candle hasn't cured long enough. | Use a fragrance load of 6-10%. Add fragrance oil when the wax is 180-185°F (82-85°C) and stir for a full 2 minutes. Let the candle cure for 1-2 weeks. |
Think of this table as your go-to cheat sheet. Candle making is a science, but with a little practice and troubleshooting, you'll be creating beautiful, perfectly burning candles in no time.
Got Questions About Soy Candles? Let's Talk.
As you get your hands waxy and start making candles, you're bound to run into a few head-scratchers. It’s a natural part of the learning curve, and trust me, every experienced chandler has asked these same questions at some point. Let's get you some clear answers.
Why Does My Soy Candle Look All Bumpy After I Burn It?
If you notice a rough, crater-like surface on your candle after that first beautiful burn, don't panic! You haven't messed anything up. This is a tell-tale sign of 100% natural soy wax.
This bumpy texture happens because the wax cools at an uneven rate after being melted. While it might not look perfectly smooth, it’s actually a good thing—it’s proof that you're working with a pure, natural wax without any sneaky additives. Most importantly, it won't affect the candle's performance one bit the next time you light it.
Can I Just Use Essential Oils Instead of Fragrance Oils?
This is easily one of the most common questions we get. The short answer is yes, you technically can, but there's a big "but" that comes with it. Fragrance oils are engineered specifically for candles; they’re designed to bind with the wax molecules and release scent steadily when heated.
Essential oils are much more delicate and volatile. They weren't created to be heated in a pool of wax, so their scent often burns off very quickly, leaving you with a weak-smelling candle. It can be a real letdown after all your hard work.
For a strong, consistent, and room-filling scent, you'll get the best results by sticking with high-quality fragrance oils specifically made for soy wax candles.
How on Earth Do I Pick the Right Wick Size?
Wicking is where the real science of candle making comes in, and it can feel a bit intimidating. Getting it right is crucial, and it all boils down to one key measurement: the diameter of your container.
It's a common mistake to think the height or volume of the jar matters most, but it's all about that width.
- A wick that's too small will "tunnel" down the middle, leaving a thick wall of wasted wax around the edge.
- A wick that's too big is a major safety hazard. It creates an enormous flame, spits out soot, and will burn through your beautiful candle way too fast.
The best way to get it right is to check the wick-sizing guide from your supplier. They've done the testing for you, matching their wicks to specific container diameters. My pro tip? Always pour one test candle before making a big batch. It saves a lot of time and materials in the long run.
Ready to skip the DIY and indulge in a perfectly crafted candle? Shivora Candles offers a luxurious collection of hand-poured soy candles, made with clean, non-toxic ingredients for a flawless, fragrant burn every time. Explore our scents.